
The Right Way to Fourth Of July Nail Ideas
The Right Way to Fourth Of July Nail Ideas
The easiest way to nail a festive look is to plan ahead. In this guide you'll find practical, step-by-step fourth of july nail ideas that work for beginners and pros alike. From prep to polish to finishing touches, these techniques make the difference between a good manicure and a flawless patriotic set.
fourth of july nail ideas: where to start
Choosing the right fourth of july nail ideas starts with understanding your skill level and the event. Are you attending a backyard barbecue, a formal fireworks show, or a pool party? The occasion affects durability and design.
Begin with a quick sketch or mood board. Pick two primary colors—traditionally red and blue—and a neutral white or nude as a base. Keep a small notebook or a saved inspiration page and collect examples. If you need design inspiration, check ombre and white design collections like this ombre gallery and white designs page for complementary looks:
- Ombre inspiration: https://naildesignerai.com/ru/nail-ideas/ombre-nail-ideas
- White designs for accents: https://naildesignerai.com/nail-designs/white-nail-designs
Decide whether you want long-lasting gel or quick-dry polish. Long events or water activities usually call for gel or a strong topcoat. For a quick at-home fix, breathable, quick-dry polishes are best.
Prep and tools you need
Good fourth of july nail ideas begin with preparation. Prep affects how long your design lasts and how clean the final look is.
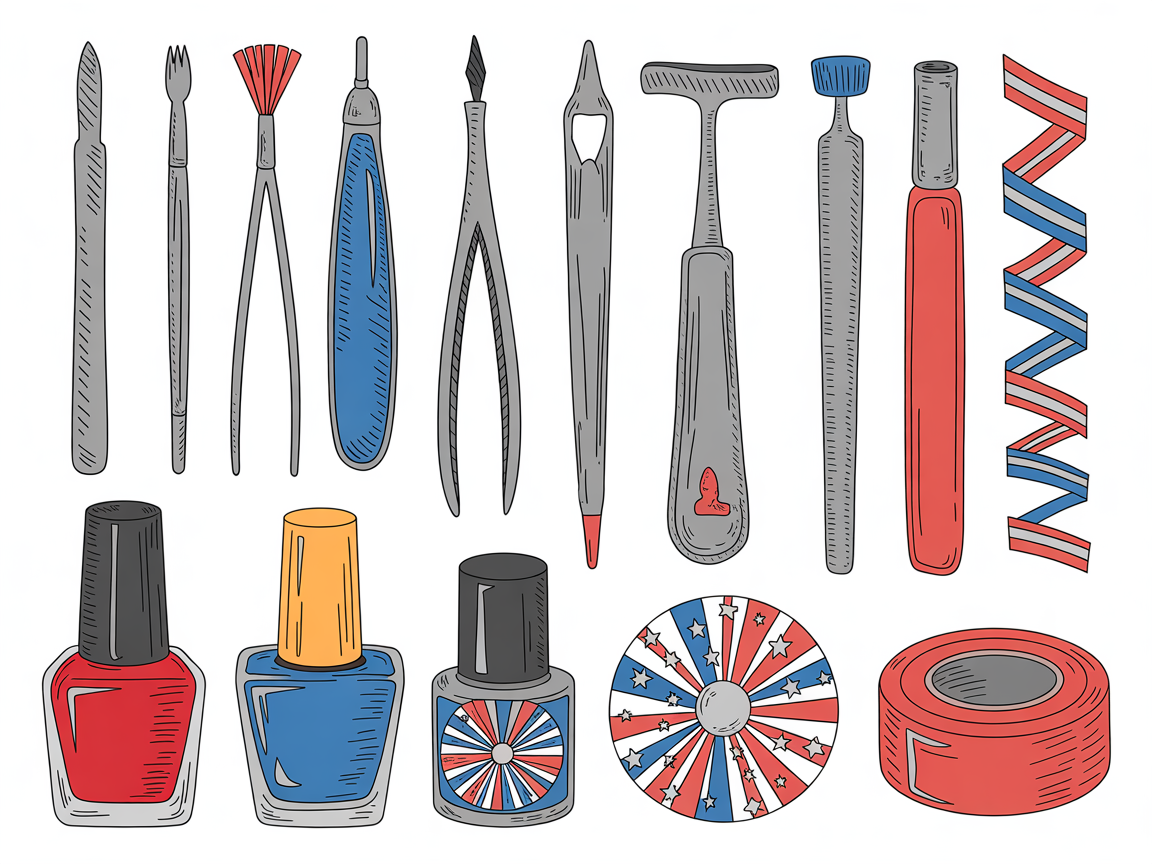
Essential tools:
- Nail file and buffer
- Cuticle pusher and nippers
- Base coat and topcoat
- Red, white, and blue polishes (matte or glossy)
- Thin striping brush or nail art pen
- Dotting tool or bobby pin for stars and dots
- Small rhinestones, glitter, or striping tape for accents
Prep steps:
- Remove old polish and sanitize hands.
- Shape nails using a file; short, squared, or rounded shapes are easiest to maintain. If you prefer short designs, review short nail ideas here: https://naildesignerai.com/ru/nail-designs/short-nail-designs
- Gently push back cuticles and remove hangnails.
- Lightly buff the nail surface and remove dust with alcohol.
- Apply a thin base coat to protect the nail.
Small details in prep multiply into better results. Drying time between thin layers prevents bubbling and smudges.
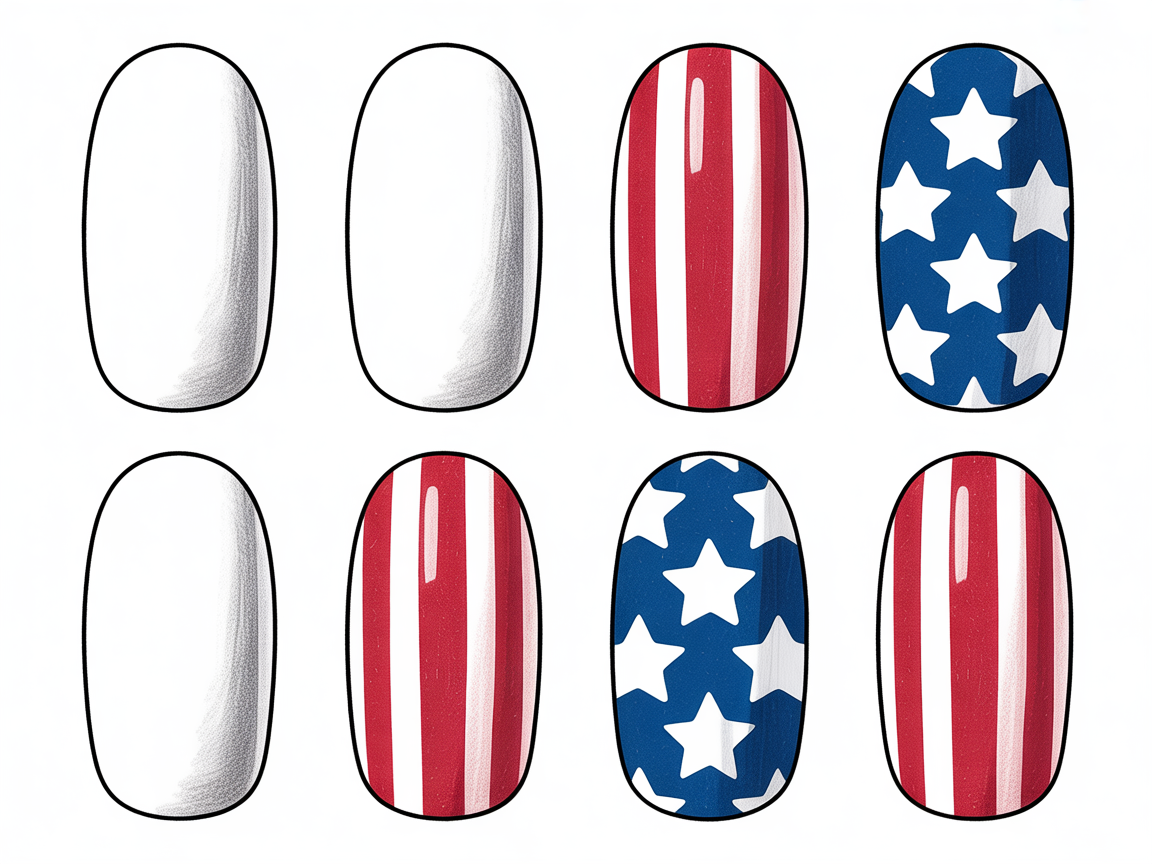
Classic Red, White & Blue Designs

Classic fourth of july nail ideas often use color blocking, glitter accents, and star decals. These are versatile and work for most nail shapes.
Step-by-step for a simple classic set:
- Apply two thin coats of your chosen base color (white or a soft nude). Let each coat dry.
- Use tape or a French tip guide to create clean blocks of color. Paint red on one side and blue on the other for a split-design.
- Add small star decals or use a tiny dotting tool to create clusters of stars in white over the blue.
- Finish with a thin glitter accent on one or two nails for sparkle.
Tips:
- Use thin layers: thick polish causes uneven drying.
- Clean up edges with a small brush dipped in acetone for crisp lines.
- Swap a matte topcoat on one accent nail for contrast.
This approach gives a polished, wearable look that stays true to patriotic motifs without being overdone. For creative variations, pair these classic motifs with an ombre accent nail or a negative-space design pulled from inspiration galleries like this explore collection: https://naildesignerai.com/explore/cm5i05a5a01afpb1et0ld2mc4
Easy Stars & Stripes for Beginners
If you’re new to nail art, some fourth of july nail ideas are simpler than they appear. Stars and stripes can be made with household items and a little patience.
Beginner-friendly method:
- Stripes: Use striping tape or a thin brush. Paint the base color, let dry, then apply tape and paint secondary color. Remove tape carefully after about 30 seconds.
- Stars: Instead of freehanding stars, use a star-shaped hole punch to create a stencil, or use a white dot pattern to imply stars over a blue background.
Practice tips:
- Try designs on a plastic tip or a practice nail first.
- Use quick-dry drops or a blow dryer on low to speed drying between layers.
- Keep acetone and a clean-up brush handy to correct small mistakes.
These beginner fourth of july nail ideas minimize frustration and give crisp results without advanced tools.
Accent Techniques: Glitter, Rhinestones, and Negative Space
Accent choices elevate your fourth of july nail ideas from cute to chic. Select one or two accents and repeat them across nails to keep the design cohesive.
Popular accents:
- Glitter gradients: Dab glitter from the tip toward the cuticle for a fade effect.
- Rhinestones: Place tiny stones on an accent nail or along the cuticle line.
- Negative space: Use tape to leave sections of the natural nail exposed for a modern look.
How to apply rhinestones:
- Apply a small dot of topcoat where you want the stone.
- Use a wax pencil or tweezers to set the rhinestone gently.
- Seal with a generous topcoat around the stone. For extreme durability, add a small drop of nail glue.
Balancing accents keeps fourth of july nail ideas stylish and wearable. Too many elements can look cluttered; choose a focal point nail and keep others simple.
Finishing Touches and Common Pitfalls
The final steps make or break your manicure. Proper finishing keeps your fourth of july nail ideas looking fresh for days.
Sealing the design:
- Use a glossy or matte topcoat depending on your chosen finish.
- Apply two thin topcoat layers, allowing a short dry time between applications.
- For gel: cure according to manufacturer instructions and finish with a no-wipe topcoat if needed.
Common pitfalls and fixes:
- Smudging: Wait longer between layers and use a fast-dry topcoat.
- Chipping: Ensure the edges are sealed with topcoat and avoid thick layers.
- Overworking details: If a detail looks uneven, remove it with a small brush and reapply cleanly.
Maintenance tips:
- Reapply topcoat every 2-3 days for longevity.
- Wear gloves for chores involving water and detergents.
- If a nail chips, file the edge and touch up with polish, then reseal with topcoat.
Design Ideas by Occasion and Nail Shape
Choosing the right fourth of july nail ideas also means matching design complexity to nail shape and activity level.
Short nails: Keep stripes and single-star accents. Short shapes show less detail, so bold color blocks work best.
Long nails: Use negative space, intricate star patterns, and fine striping. Longer canvases allow for layered designs.
Pool or beach days: Use gel polish and waterproof topcoats to avoid peeling.
Formal events: Keep one or two nails ornate and the rest clean. An accent glitter nail paired with minimalist white and blue works well.
For more shape ideas and galleries, explore curated examples and galleries on our site that pair well with these fourth of july nail ideas:
- Explore gallery: https://naildesignerai.com/explore/cm5i05a5a01afpb1et0ld2mc4
How to Practice and Improve Fast
Practice makes execution smooth. Set aside 20–30 minutes twice a week focused on one element: stripes, stars, or gradients.
Practice routine:
- Week 1: Master tape placement and striping.
- Week 2: Dotting and star patterns.
- Week 3: Glitter gradients and rhinestone placement.
Recording progress with photos helps you see improvement and refine color combos. If you want to save designs or try custom AI-generated ideas, register and save looks at /auth/register.
Conclusion
Clear, achievable fourth of july nail ideas start with preparation, the right tools, and focused practice. Whether you pick classic red, white, and blue, go for subtle negative space, or try rhinestone accents, these step-by-step techniques will help you get a clean, long-lasting manicure. Follow the prep steps, keep layers thin, and choose accents sparingly for the best results with fourth of july nail ideas.