
Oval Nail Ideas Made Easy: A Practical How-To
Oval Nail Ideas Made Easy: A Practical How-To
Oval nail ideas are a versatile, flattering choice for everyday wear and special occasions alike. In this practical how-to guide you'll find clear, step-by-step instructions for shaping, designing, and maintaining oval nails. Whether you're a beginner at home or a stylist refining technique, these oval nail ideas will help you create professional-looking results.
Why Choose Oval Nails
Oval nails combine strength and elegance. The rounded edges reduce snags and breaks, while the softly tapered sides create the illusion of longer fingers. Many clients prefer oval shapes because they balance functionality with a classic aesthetic.
Oval nail ideas work well with many lengths, from short and practical to medium and elegant. If you want inspiration for length-specific looks, check our medium nail ideas for examples and variations: https://naildesignerai.com/nail-ideas/medium-nail-ideas.
Tools You Need
Before you start, gather these basic tools: a medium-grit nail file, a buffer, cuticle pusher, nail clips or scissors, base coat, color polish, and a quality topcoat. For salon-level finishes, add a gel lamp and gel polishes.
A consistent set of tools gives consistent results. High-quality files and buffers make shaping oval nails faster and more precise.
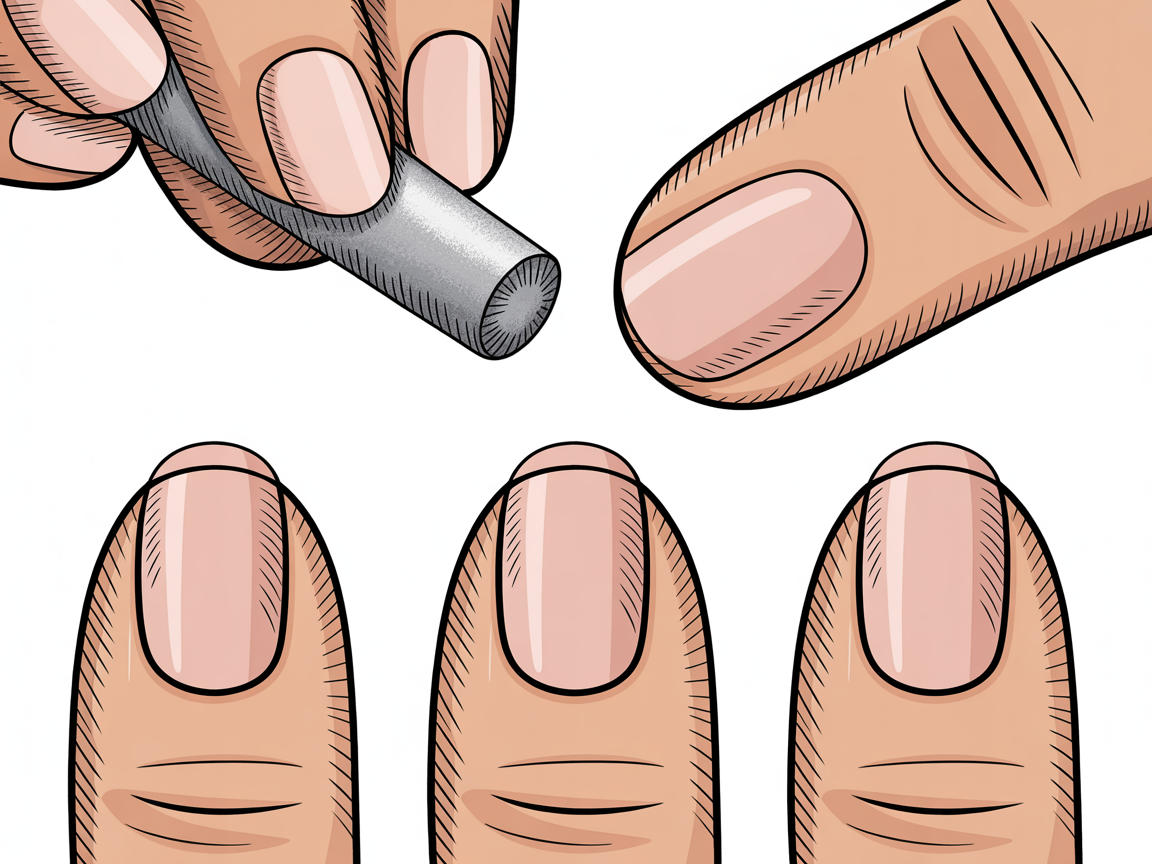
Shaping Oval Nails
-
Trim to length: Start slightly longer than your target. You can always remove more later. Shorter trimmed nails make small corrections easier.
-
File the sides: Use a gentle, sweeping motion from the side toward the center. Keep the same angle on both sides to maintain symmetry. Avoid sawing motions that create rough edges.
-
Round the tip: File the free edge into a soft curve. The oval shape blends the sidewall into a gentle arc across the tip. Check from the front and side to keep the curve even.
-
Smooth with a buffer: Lightly buff the surface and the edges to remove filing marks. This creates a clean base for polish.
Shaping is the foundation of all oval nail ideas. Spend time here to ensure your finished designs look crisp and professional.
Extra shaping tips:
- File in one direction for natural nails to prevent splitting. For artificial nails, a softer back-and-forth is acceptable when using proper tools.
- Use guided templates for beginners to maintain consistent curvature across all nails.
- Keep a visual reference or mood board of oval nail ideas to match shape to design.
Oval Nail Ideas: Top Styles
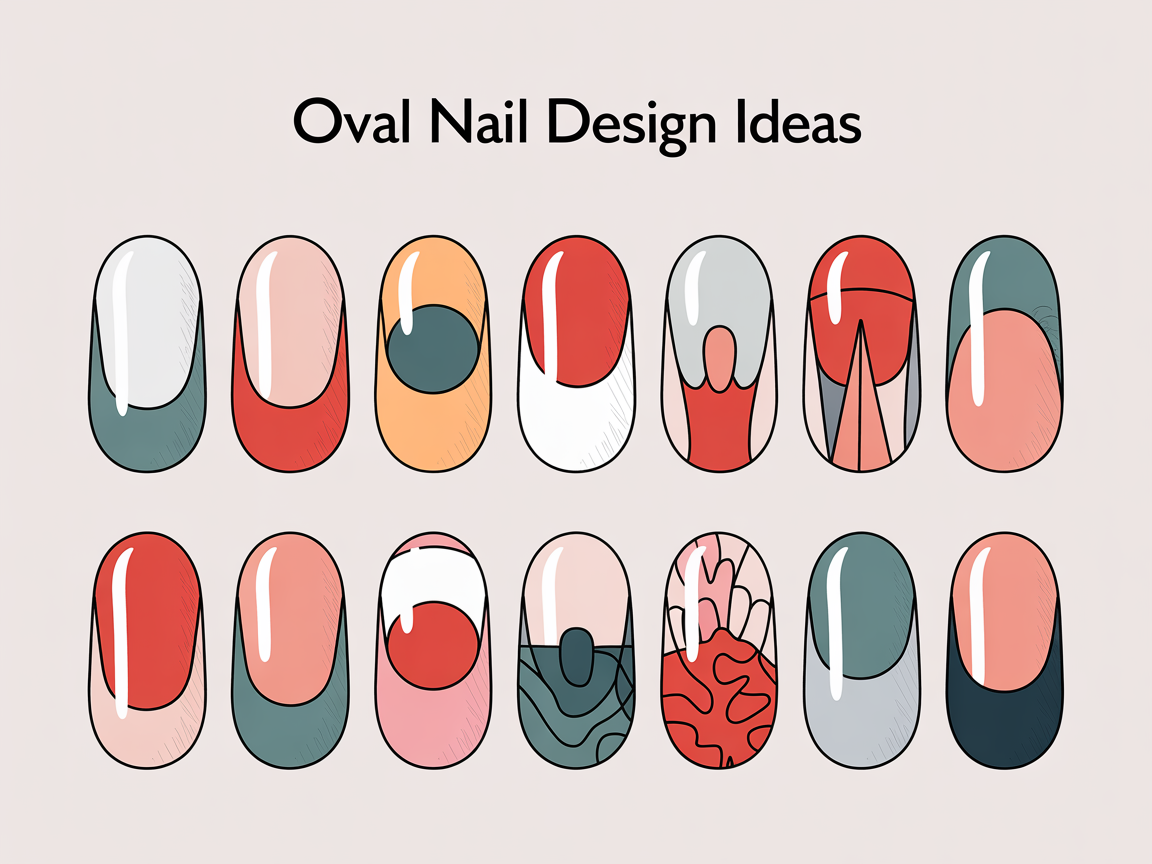
Here are practical oval nail ideas you can recreate easily at home or in the salon.
-
Classic French oval: A sheer nude base with a crisp white smile line. Use a guide sticker for precision.
-
Soft ombré: Blend two complementary shades from cuticle to tip. A sponge or brush can help create a seamless fade.
-
Minimalist line art: Thin black or metallic lines near the cuticle or along the sidewall add modern interest without bulk.
-
Matte neutral with glossy tips: Apply matte topcoat and add glossy accents on the tip for a subtle contrast.
-
Accent-nail sparkle: Keep most nails understated and add a sparkle or gem to one nail as a focal point.
Detailed how-to for a French oval:
- Prep the nail with a base coat and two thin coats of sheer nude.
- Lightly sketch the smile line with a thin brush or use a sticker as a guide.
- Fill the tip with white polish, clean edges with a small brush and acetone.
- Seal with a glossy or matte topcoat depending on your preferred finish.
Detailed how-to for soft ombré:
- Choose two shades that blend well, often a light and a medium tone.
- Apply the lighter color as a base. Dab the darker color with a sponge starting at the tip.
- Blend the join with a clean sponge dab, then smooth with a thin layer of topcoat.
You can find many design variations and generated inspirations in our explore gallery to spark new looks: https://naildesignerai.com/explore/cm5i04ovr018opb1ecu8uzssi. Experiment with color and texture — oval nail ideas thrive on subtlety.
Coloring and Polish Tips
Choose polishes that complement skin tone and occasion. For long-lasting color, always start with a clean, de-greased nail surface and a thin base coat.
Apply two thin coats of color rather than one thick coat. Thin layers cure or dry more evenly and reduce chipping. Finish with a quality topcoat and allow sufficient drying time between steps.
If you use gels, cure each layer under the lamp per manufacturer instructions. For gel polish removal, never peel; soak and gently push off softened product to protect the natural nail.
Polish troubleshooting:
- Bubbles: Avoid shaking polish; roll between palms instead. Apply thinner layers.
- Streaks: Use a high-quality brush and even brush strokes from cuticle to tip.
- Chipping: Ensure blunt free edges are sealed; thin layers reduce lifting.
Care & Maintenance
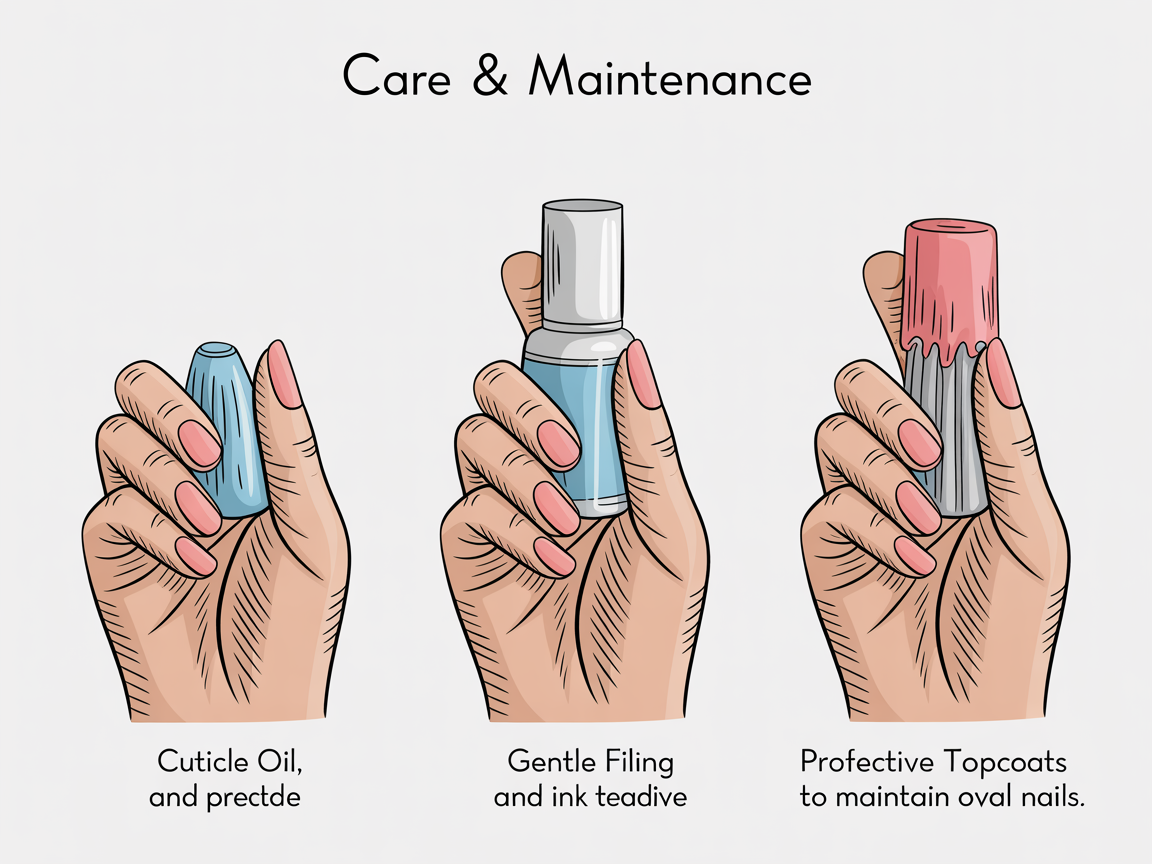
Taking care of your oval nails will keep them looking fresh longer. Here are essential maintenance tips:
- Hydrate cuticles daily with oil to prevent hangnails.
- File lightly every week to maintain the oval curve and remove chips.
- Reapply topcoat every 3–5 days to protect polish and boost shine.
If you experience lifting with enhancements, address it early to prevent moisture or debris from getting under the nail. Regular salon visits or at-home touch-ups will preserve your oval nail ideas.
Advanced maintenance routine:
- Weekly: Light file, cuticle oil, and topcoat refresh.
- Monthly: Professional soak-off and reapplication for gels or enhancements.
- As needed: Repair cracks with a thin gel overlay or silk wrap until a full service can be performed.
Common Pitfalls and How to Fix Them
Even experienced technicians can hit snags. Here are common problems and quick fixes:
-
Uneven curves: File gently and check from multiple angles. Use a nail form or template if needed.
-
Tips that split: Shorten the nail slightly and strengthen with a thin gel overlay or a protective topcoat.
-
Smudged polish: Allow extra drying time between coats, or use a fast-dry topcoat. For gels, ensure full cure under the lamp.
-
Overly bulky designs: Keep surface decoration low-profile on oval nails to maintain the sleek silhouette.
Problem-solving checklist:
- Always reassess shape first—design will look off if the base shape is uneven.
- Use a magnifier or good light to inspect edges and sidewalls.
- When in doubt, simplify the design. A clean, well-executed minimalist look often outperforms a rushed complex art piece.
Styling for Different Hand Shapes
Oval nail ideas are adaptable to many hand and finger shapes. Here’s how to tailor the look:
-
Short fingers: Keep nails slightly longer to create balance. Avoid extreme almond points.
-
Wide nail beds: Use length and a tapered curve to create a slimmer appearance. Vertical patterns can elongate.
-
Long fingers: Shorter ovals look elegant and practical; maintain a neat, rounded edge.
Customization tips for clients:
- Discuss lifestyle: Active hands may prefer shorter ovals and durable topcoats.
- Consider ring choices: Longer nails may compete with large rings; match length to accessories.
- Use test swatches for color decisions to view polish against natural skin tone.
Where to Find More Inspiration
If you want generated examples or a gallery to browse, explore our curated collections and design samples. Our generated galleries offer quick prompts and visuals you can adapt: https://naildesignerai.com/explore/cm5i00ru300gipb1eg03074ct. For a broader set of looks, visit the design exploration page to spark fresh ideas: https://naildesignerai.com/explore/cm5i01fag00zcpb1edqcqm6a3.
To save favorite designs or use advanced features, you can create an account here: https://naildesignerai.com/auth/register.
Professional Techniques and Time-Saving Shortcuts
For salon pros or busy at-home artists, efficiency matters. Here are techniques that save time while maintaining quality:
- Use LED curing lamps for faster gel cures and less client downtime.
- Pre-shape forms to your preferred oval dimensions to speed up consistency across services.
- Keep a small toolkit of prepped nail stickers and guides for French lines and smile arcs.
Shortcuts that don't compromise quality:
- Keep polish thin and work quickly in small sections to avoid dragging.
- Use a topcoat brush technique that seals edges to extend wear.
- Pre-mix ombré sponges for common color combos to reduce prep time.
Frequently Asked Questions (FAQ)
Q: Can short nails be oval? A: Yes. Oval nail ideas translate beautifully to short nails and can make fingers look proportionate and neat.
Q: Are oval nails stronger than almond? A: Oval shapes tend to be stronger because the curve distributes stress across the tip more evenly.
Q: How often should I reshape oval nails? A: Light maintenance every 1–2 weeks keeps the curve and prevents chips.
Q: Can I use acrylics for oval shapes? A: Absolutely. Acrylics allow for stronger tips and more dramatic lengths while keeping the oval silhouette.
Conclusion
Oval nail ideas provide a timeless, versatile foundation for countless styles. With proper shaping, mindful polish application, and consistent maintenance, these oval nail ideas can be recreated reliably at home or in a salon. Practice the shaping steps, test a few design variations, and use the care tips above to keep your results looking fresh and polished.