
Neon Nail Ideas for Beginners: Complete Walkthrough
Neon Basics and Supplies
neon nail ideas are easier than they look when you start with the right supplies and a clear plan. Beginners benefit most from a short, functional kit: base coat, neon polishes in 2–3 colors, a high-quality top coat, nail file, buffer, cuticle pusher, and cotton pads. If you use gel, add a UV/LED lamp and gel base/top coats.
Set up a neat workspace with a towel, good lighting, and a cup of water for cleanup. Clean nails and remove oils with rubbing alcohol to help neon pigments adhere. These small prep steps make a big difference in how neon nail ideas appear and last.
Neon Nail Ideas: Simple Looks for Beginners
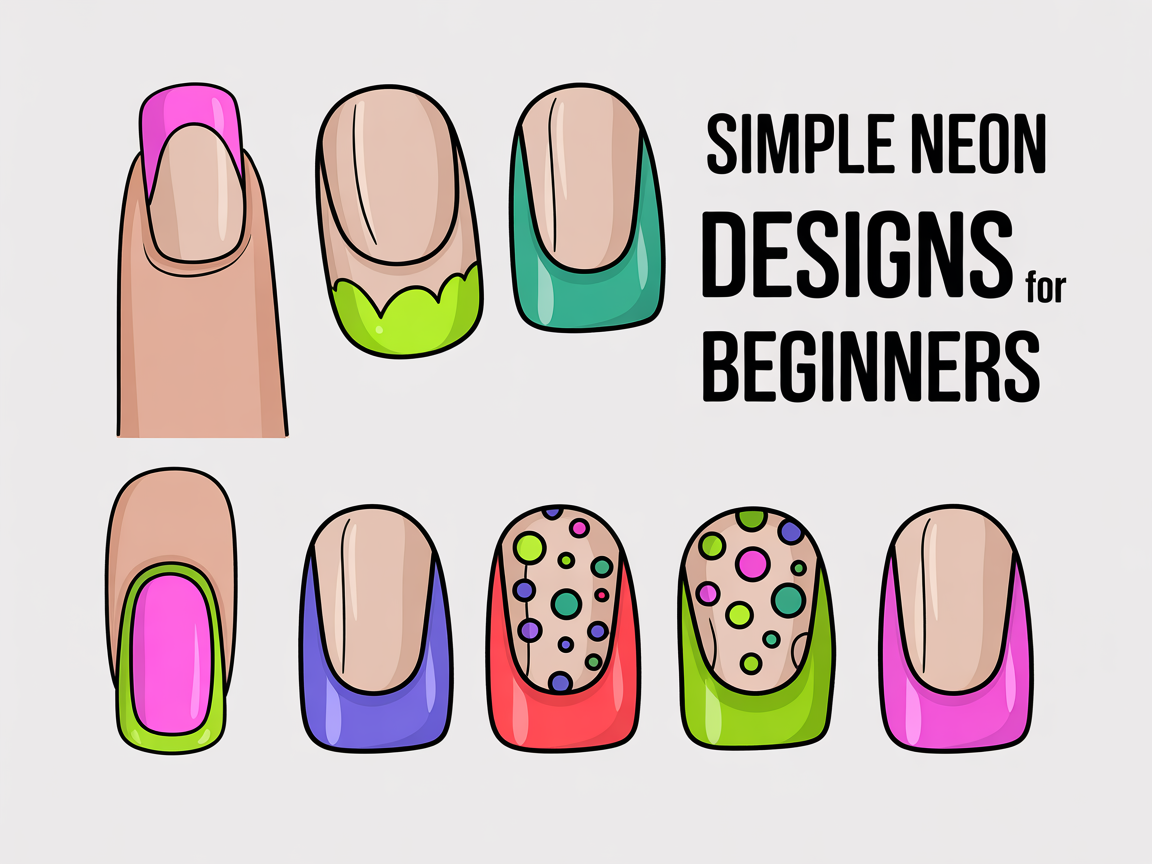
When you explore neon nail ideas, start with simple designs that highlight color rather than complex patterns. Single-color neon, neon French tips, and small accents give a bold look without advanced skills.
Try these beginner-friendly neon nail ideas:
- Single-color neon: paint all nails in one neon shade for a uniform, eye-catching finish.
- Neon French tips: use tape or a steady hand to paint a neon strip across the free edge.
- Neon accents: add a neon dot near the cuticle or a thin neon line on one nail for subtle punch.
- Neon plus neutral: combine neon on an accent nail with muted tones on the rest.
For visual examples, compare how neon works on different lengths in the long nail ideas and short nail ideas galleries. If you want softer neon palettes, browse pink nail designs for pairing ideas.
Techniques and Application
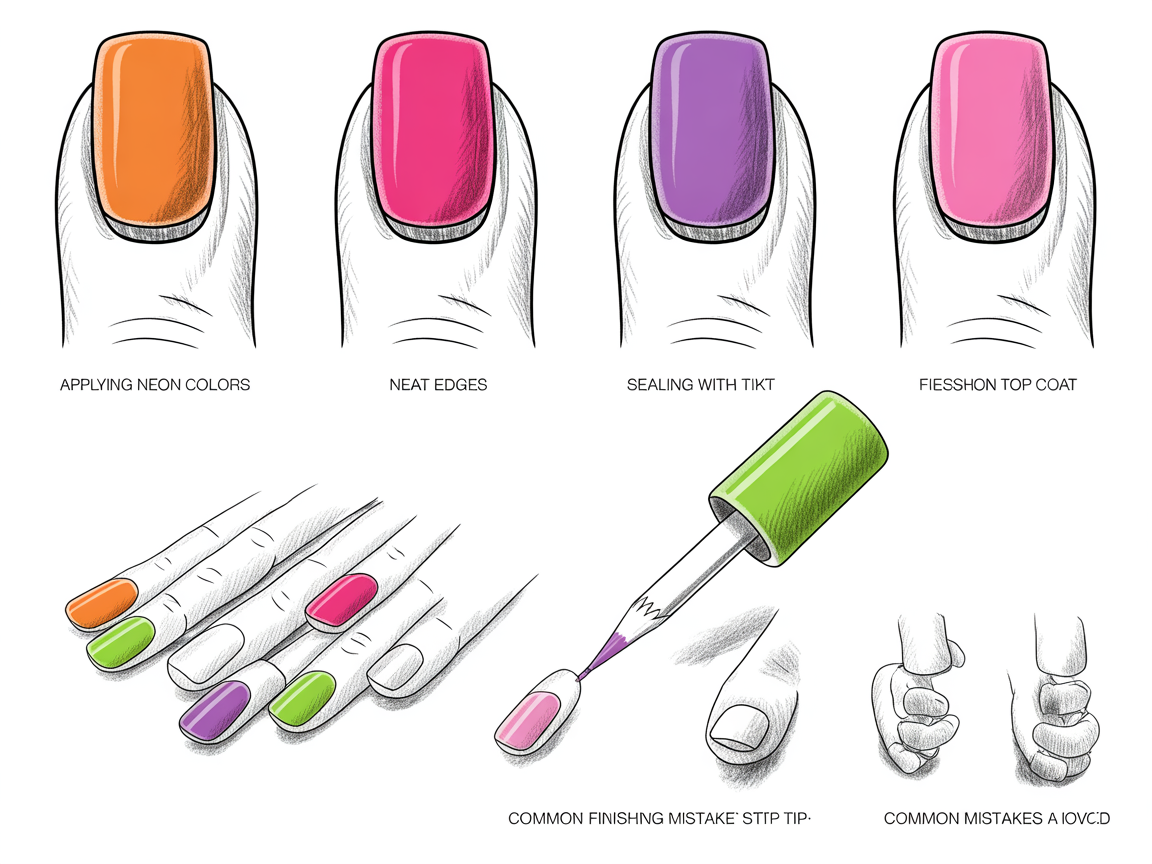
The secret behind many striking neon nail ideas is technique: thin layers, white base when needed, and careful sealing. Follow these steps for consistent results.
- Prep nails properly
- Push back cuticles, file to the desired shape, and lightly buff. Clean with alcohol.
- If nails are porous or stained, use a white base coat or white polish as an underlayer to make neon pigments pop.
- Paint with thin coats
- Apply neon polish in thin, even layers. Thick swipes often create streaks.
- Allow each coat to dry before adding the next. Two to three thin coats usually suffice.
- Create clean tips and accents
- Use nail guides or tape for precise French tips.
- For dots and small shapes, use a toothpick or dotting tool for consistent size.
- Seal and finish
- Apply a glossy top coat to enhance shine and protect the neon surface.
- For gels, cure each layer under the lamp and finish with a gel top coat for durability.
These techniques support many neon nail ideas, from gradients to color-block looks. Practice on a single nail as a test before committing to a full hand.
Nail Shape, Color Pairing, and Design Variations
Nail shape and color choices greatly influence how neon nail ideas read on the hand. Match shapes and palettes to your personal style.
- Short nails: choose small neon accents or tips to avoid overpowering shorter lengths.
- Long nails: single-color neon or bold geometric neon blocks make a strong statement.
- Almond or oval: these shapes soften neon's intensity. Square or stiletto shapes emphasize brightness.
Color pairing ideas:
- Neon yellow + black or nude looks chic and graphic.
- Neon pink + pastel greys or creams for balanced contrast.
- Neon green + white base for a fresh, pop effect.
Design variations to try:
- Neon ombré: sponge two neon shades together for a gradient effect.
- Neon with matte top coat: apply a matte finish to neon for a modern, muted look.
- Neon outlines: use a thin black or white line to frame neon sections for a refined result.
For inspiration on combining neon with special occasion looks, compare engagement or celebration styles in the engagement nail ideas gallery.
Troubleshooting and Maintenance
Many beginners encounter similar issues when trying neon nail ideas. These quick fixes help preserve the look.
- Streaking or uneven coverage: apply more thin coats rather than one thick coat. A white undercoat often reduces streaks.
- Chipping at the tip: seal the free edge with top coat by brushing the tip horizontally.
- Neon fading: store neon polish out of direct sunlight and apply a fresh top coat every few days.
Maintenance tips:
- Reapply a thin top coat every 3–5 days to maintain shine and protect neon polish.
- Avoid harsh detergents or wear gloves when cleaning to prevent premature wear.
- Keep cuticles moisturized with oil to reduce peeling and prolong the manicure.
Common mistakes to avoid:
- Skipping prep: oily nails cause lifts and chips.
- Rushing coats: neon requires patience between thin layers.
- Using expired or thickened polish: refresh with polish thinner if needed.
Creative Project Examples and Step-by-Step Routines
Below are a few complete routines that beginner nail artists can follow to try new neon nail ideas. Each routine uses basic tools and takes about 45–75 minutes depending on drying time.
Routine A: Classic Neon Mani (for beginners)
- Prep nails, buff, and clean.
- Apply base coat.
- If needed, apply one thin white coat as a primer.
- Apply two thin coats of neon polish, letting each dry.
- Seal with a glossy top coat.
Routine B: Neon French Tips
- Prep nails and apply a neutral base color.
- Place French tip guides or use steady freehand to paint neon tips.
- Allow to dry and remove guides.
- Add top coat, sealing tips carefully.
Routine C: Accent Neon Dot
- Paint all nails neutral or nude.
- Dip a dotting tool into neon polish and place a small dot near the cuticle on one or two nails.
- Finish with a top coat.
These step-by-step neon nail ideas let beginners practice technique on a single look before branching out.
Conclusion
Neon nail ideas are a fun, accessible way for beginners to experiment with bold color. Focus on good prep, thin layers, and simple designs like single-color mani, neon French tips, or small accents. With practice and a handful of techniques, you’ll be able to create neon looks that are bright, wearable, and long-lasting.
Keep exploring galleries such as long nail ideas and short nail ideas to see variations and inspiration. If you want to save favorite looks or templates, sign up at /auth/register and keep a curated collection of neon ideas. Happy painting!