
Nail Ideas Black: From Beginner to Pro
Title: Nail Ideas Black: From Beginner to Pro
Introduction
Black nails offer timeless elegance and bold expression. If you’re searching for nail ideas black that work from casual to couture, this guide walks you from basic prep to advanced finishes. Whether you’re a beginner learning shapes and polish or a pro refining ombré and chrome techniques, you’ll find clear steps, common pitfalls, and proven methods to get consistent results. Throughout, the focus will remain practical: what to buy, how to apply, and how to troubleshoot common problems so your black nail designs last longer and look sharper.
Nail Ideas Black: Basics
Start with understanding why black works: it contrasts with skin tones, hides minor imperfections, and pairs well with accents. Nail ideas black cover a range of finishes—cream, matte, and glossy—each with its own application tips. Knowing these will help you tailor a look that’s durable and striking.
Key basics:
- Choose the right black: deep true black vs soft charcoal. True black is bold and dramatic; charcoal is softer and more forgiving on imperfect application.
- Pick a finish: matte for understated, glossy for shine, or satin for balance. Matte tends to show oils, so prep well.
- Know your shapes: almond, square, stiletto, and round change the design’s vibe. The same black polish reads differently on each shape.
If you want to explore specific shapes for your next look, see almond nail inspirations here: https://naildesignerai.com/nail-designs/almond-nail-designs.
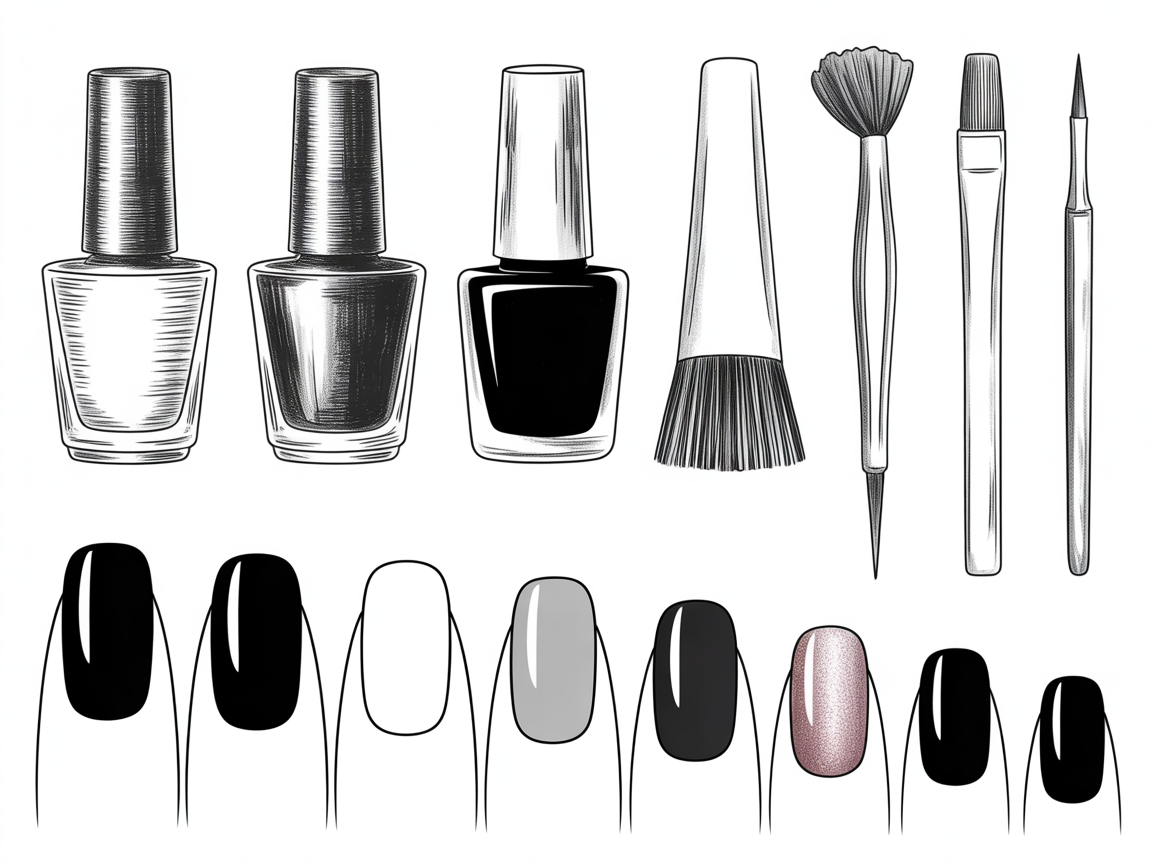
Tools & Prep
Proper prep reduces chipping and uneven coverage. You’ll need basic tools and a clean workspace, plus a few pro tips that make a big difference.
Essential tools:
- Nail file and buffer
- Cuticle pusher and trimmer
- Base coat and top coat
- Quality black polish (and a backup thin black for details)
- Clean-up brush and acetone
Prep steps:
- Shape nails gently; avoid over-filing. Too thin nails are prone to breakage.
- Push back cuticles and remove dead skin—do not cut live tissue. Healthier cuticles equal longer-lasting polish.
- Buff lightly to smooth ridges and cleanse with alcohol or nail cleanser to remove oils.
- Apply a thin base coat to protect the nail and improve adhesion. If using gel, use a no-wipe base when needed.
Pro tip: wipe the nail plate with alcohol after buffing and before base coat to ensure oil-free surfaces. This is a simple step that improves adhesion for almost all nail ideas black.
Beginner-Friendly Black Designs
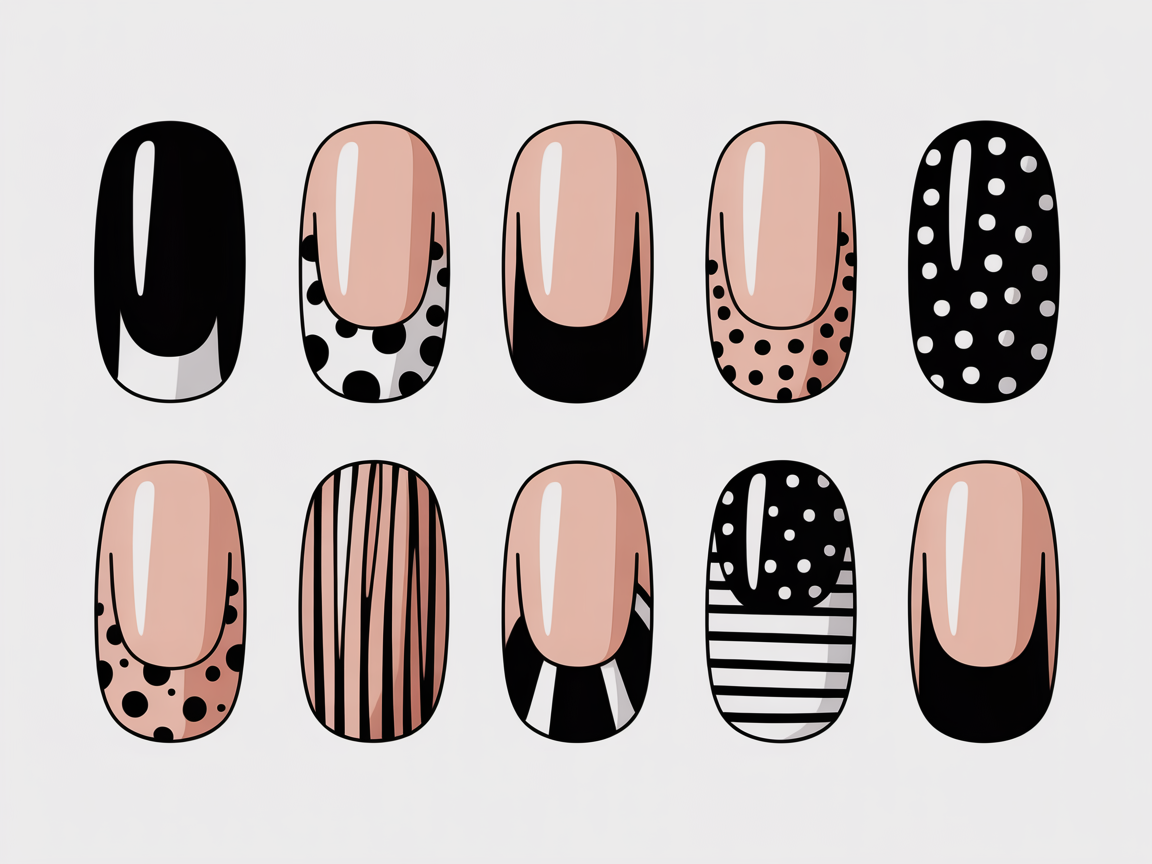
Beginner designs are forgiving and fast. These nail ideas black keep the focus on clean lines and simple accents. Learn control of polish flow and timing with these exercises.
Easy ideas to try:
- Single accent nail: paint most nails black and use a metallic or nude accent.
- Negative space: use tape to leave geometric shapes unpainted. It creates a modern look with little precision required.
- Dots and stripes: thin striping brush or dotting tool creates quick patterns that look intentional.
Step-by-step for negative space stripes:
- Apply base coat and let dry fully.
- Use thin tape to mark off the area you want to leave clear; press edges to avoid seepage.
- Paint a thin layer of black over the nail; remove tape while polish is wet for clean lines.
- Finish with a top coat to smooth edges and protect the design.
Practice exercise: paint five swatches on paper with black polish to practice stroke length and pressure before working on nails. This helps steady your hand when creating nail ideas black.
Intermediate Techniques
Many nail ideas black become more striking when you introduce texture and contrast. Intermediate options include layering, simple gradients, and mixed finishes that blend matte and gloss.
Techniques to practice:
- Two-tone finishes: pair matte black with a glossy black accent for dynamic contrast.
- Simple ombré: use a makeup sponge to sponge black onto the tip blending to charcoal.
- Foil accents: press foil pieces onto tacky polish for metallic pops that feel luxe.
How to build a two-tone look:
- Apply base coat and two thin coats of your primary black; allow to dry.
- Tape or stencil the area for the second finish.
- Apply the different finish (matte or gloss) and seal.
Common pitfalls and fixes:
- Streaky application: ensure each coat is thin and fully dry before the next. Thick coats cause streaks and bubbling.
- Uneven gloss between layers: use a leveling top coat and avoid over-brushing.
- Lifting polish: check that the base coat has cured and nails are oil-free.
Try mixing black with subtle metallics or soft pastels for visual interest. For pairing black with soft pink tones, see these pink design examples: https://naildesignerai.com/nail-designs/pink-nail-designs.
Advanced Finishes & Troubleshooting
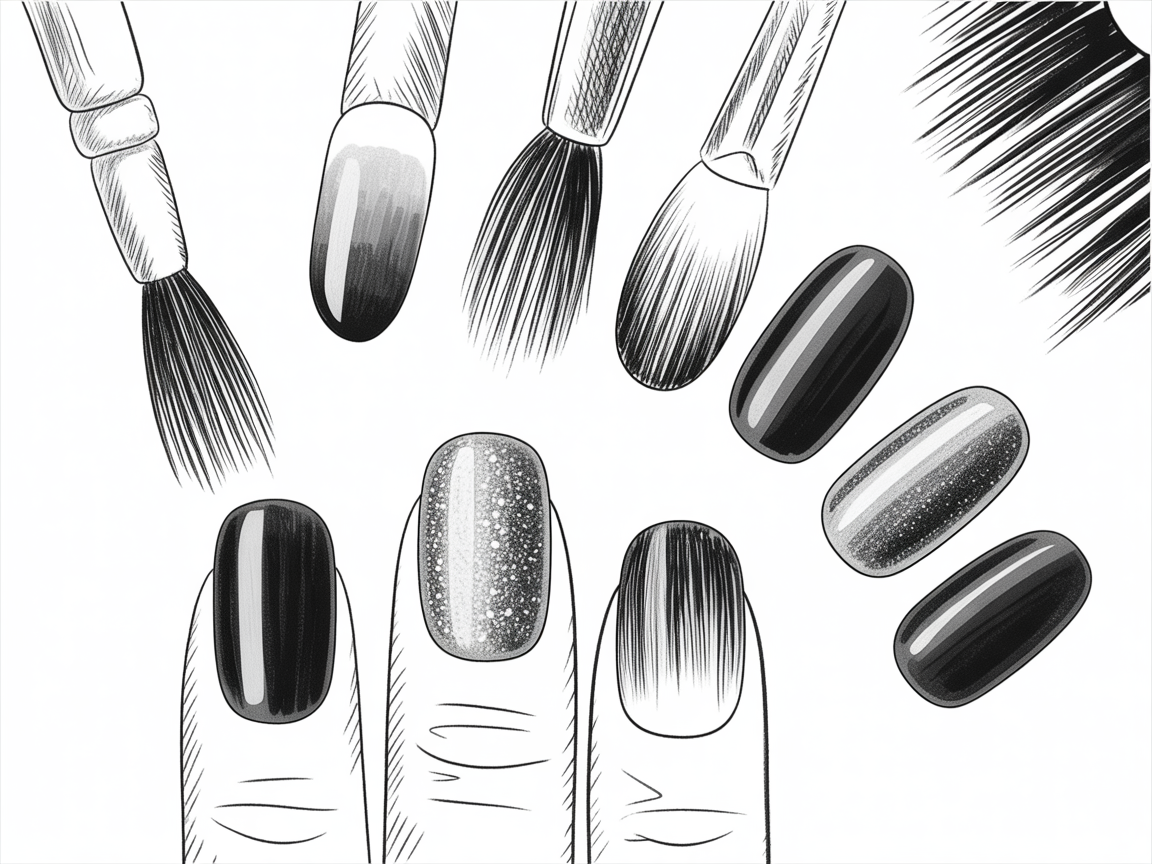
Advanced nail ideas black use tools and techniques that demand practice but deliver dramatic results. Expect to invest time in controlling layers and curing to make these finishes salon-level.
Advanced techniques:
- Chrome and pigment: apply black base, then rub chrome pigment for a mirrored effect. Use a no-wipe top coat first for best adhesion.
- Precision stamping: choose high-contrast plates and high-viscosity stamping polish for clear transfers.
- Gel layering: build depth by sealing in flakes or glitters between thin gel layers for dimensional black looks.
Pro workflow for chrome:
- Apply thin black base coat and cure (gel) or let dry (regular).
- Apply a no-wipe top coat and cure if required.
- Rub chrome pigment with an applicator in circular motions until uniform.
- Seal with a gel top coat and cure to lock the chrome.
Troubleshooting advanced issues:
- Pigment patchiness: buff lightly and apply a no-wipe top coat before pigment.
- Bubbling in gel: check cure times, lamp output, and avoid thick layers which trap solvents.
- Edge lifting with heavy embellishments: reinforce with gel and seal edges thoroughly.
Seasonal variations: layering black with autumnal browns or golds creates a warm palette—see fall styling ideas at https://naildesignerai.com/ru/nail-designs/fall-nail-designs.
Removal and Healthy Nail Care
Correct removal preserves natural nails so you can return to a fresh black look without damage. Removing black polish properly prevents staining and peeling.
Removal steps for regular polish:
- Use acetone remover on cotton wrapped with foil for 5–10 minutes to remove dense black layers.
- Gently push residual polish away with a cuticle pusher; avoid scraping.
- Rehydrate nails with oil and cream after removal to restore moisture.
For gel polish:
- File the top layer lightly, then soak in acetone. Patience reduces the need to scrape and minimizes damage.
Healthy maintenance routine:
- Trim and file weekly; avoid aggressive back-and-forth sawing motion.
- Use cuticle oil daily and give nails a polish-free week every month to recover.
- Rotate colors when possible; long-term use of dark polish without breaks can dry the nail plate.
Maintenance and Longevity
Keeping black nails looking fresh requires simple maintenance and the occasional professional touch.
Daily care tips:
- Wear gloves for cleaning and chores.
- Apply cuticle oil nightly to prevent dryness and lifting.
- Repair chips immediately with a thin coat to avoid peeling.
Longer-term care:
- Reapply top coat every 5–7 days for preserved shine and protection.
- For gel nails, schedule fills every 2–3 weeks depending on growth and wear.
- Avoid harsh acetone exposure—use gentle removers when possible.
Conclusion
Mastering nail ideas black takes deliberate practice—from basic prep and simple accents to advanced chrome and stamping. Use thin coats, the right tools, and consistent maintenance to make black nails last and look professional. Bookmark designs or create an account at /auth/register to save references and track your progress. With patience and the steps above, your black nail work can move from beginner projects to pro-level finishes.