
Learn Stiletto Nail Ideas: A Hands-On Tutorial
Learn Stiletto Nail Ideas: A Hands-On Tutorial
Learn stiletto nail ideas with hands-on steps you can follow at home or in the studio. This tutorial breaks down tools, shaping, application, and creative finishes so you can build real skills and confidence quickly. Whether you’re a beginner or refining technique, these stiletto nail ideas focus on safe, repeatable methods.
Tools & Prep
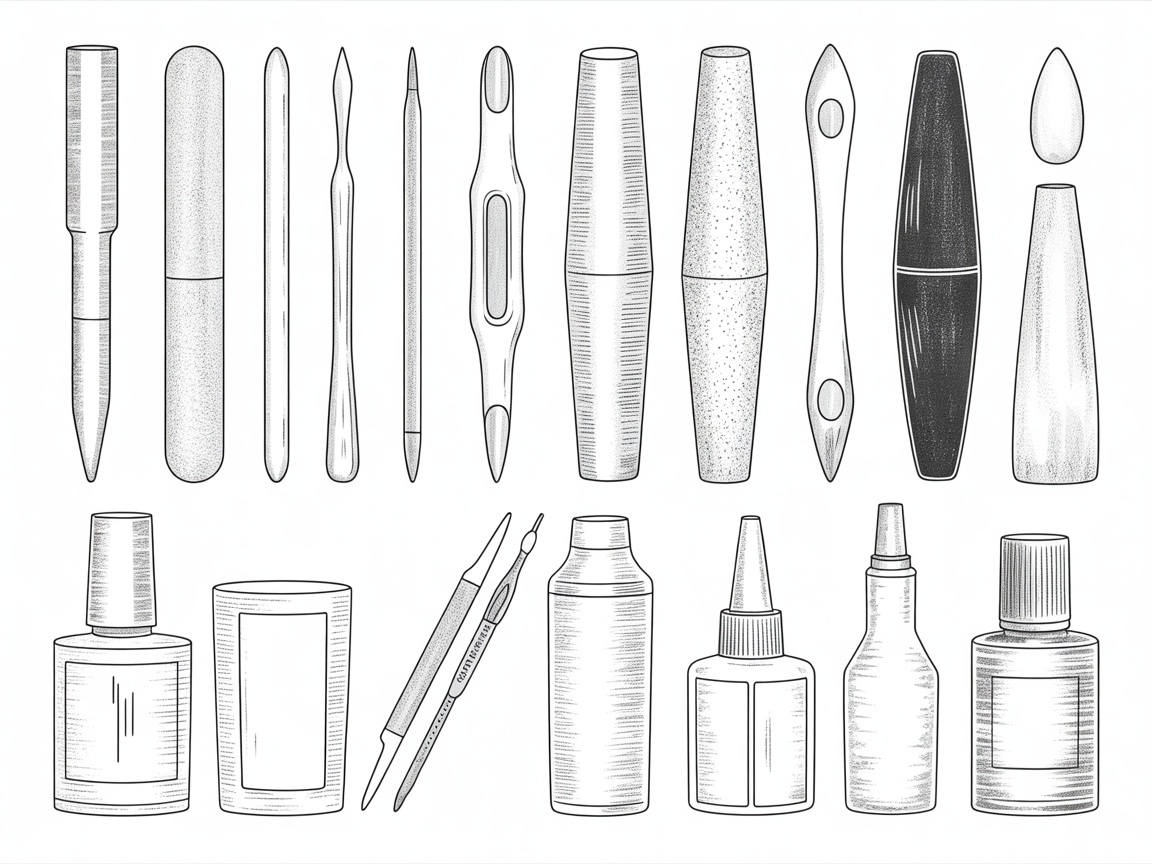
Before you start any of these stiletto nail ideas, gather the right tools. Essential items include nail forms or tips, a coarse file for shaping, a finer file for finishing, a buffer, primer, base coat, and a good LED lamp if you’re using gel. Also keep a cuticle pusher and nipper for clean prep.
Preparation steps:
- Sanitize your workspace and tools with an EPA-approved disinfectant. Cleanliness prevents infection and product contamination.
- Trim and shape the natural nail bed to a uniform length—this establishes a balanced base for overlays and tips.
- Push back cuticles and remove excess skin with care; avoid cutting live tissue.
- Lightly buff the nail surface to remove shine and improve adhesion for gels and acrylic.
- Wipe nails with alcohol or a nail cleanser to remove dust and oils.
Product recommendations for reliable results:
- Primer: acid-free primers are gentler on the natural nail.
- Base: a bonding base with medium viscosity gives a strong bridge between natural nail and enhancement.
- Files: a 100/180 grit combo works well for initial shaping and finish filing.
Proper prep reduces lifting and increases longevity for any stiletto nail ideas you attempt. For inspiration on color and finish pairings, check the red nail designs gallery for bold stiletto takes: https://naildesignerai.com/ru/nail-designs/red-nail-designs.
Practice exercise:
- Create a small practice wheel with three lengths (short, medium, long) and label them. Practice filing each to the same silhouette, then compare and adjust. Repeat this exercise weekly to improve muscle memory for consistent stiletto nail ideas.
Shaping & Sizing
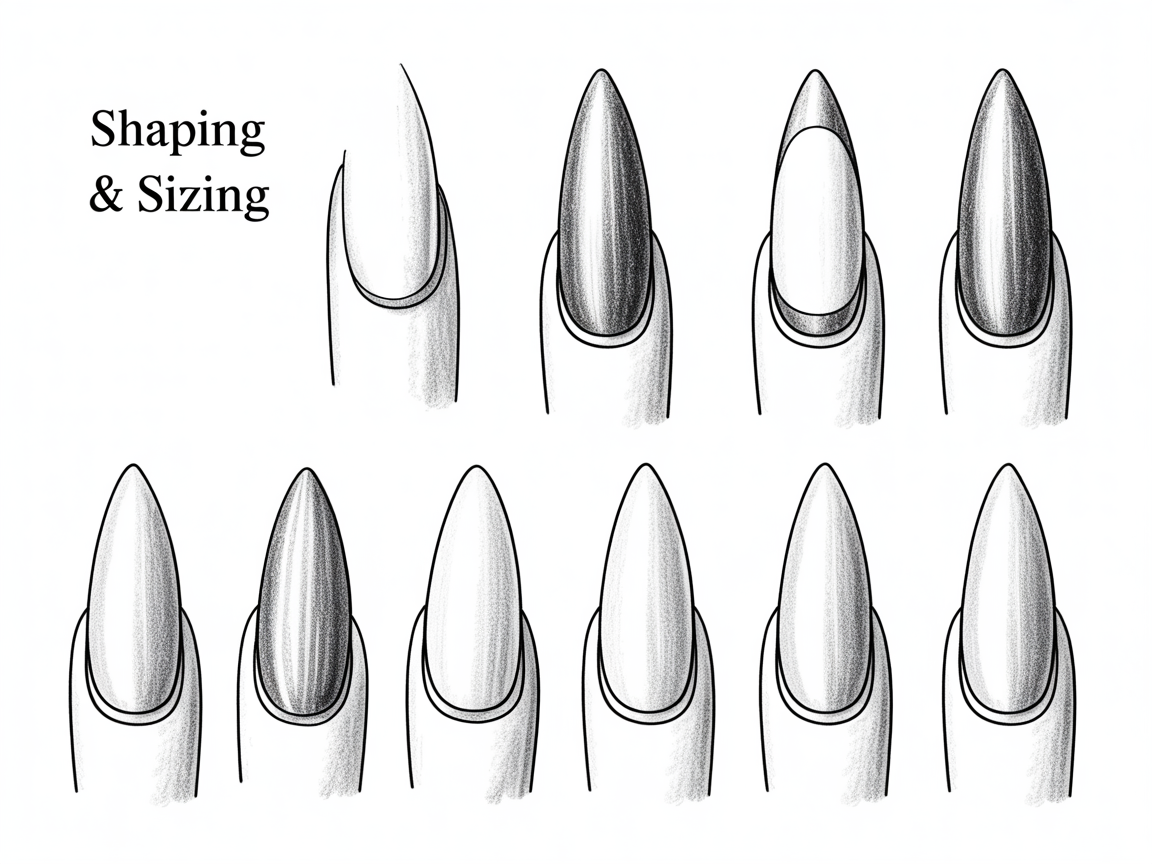
Shaping is where stiletto nail ideas really come to life. Decide on the length first: short, medium, or long. Longer stiletto nails make a more dramatic point but require stronger reinforcement. Here’s a reliable shaping approach with common mistakes to avoid:
Step-by-step shaping approach:
- Apply nail tips or sculpt with forms for the desired length. Ensure the tip fits snugly at the sidewalls to prevent gaps.
- Use a coarse file to reduce bulk and establish the taper to a point. Work in small sections and check both hands for symmetry.
- Take small, controlled strokes at a consistent angle—aim for 45 degrees—to maintain symmetry across fingers.
- Switch to a finer file and then a buffer to smooth the point and sidewalls, removing visible ridges.
- Finish by checking the silhouette against a flat background to confirm even taper.
Common mistakes and fixes:
- Overfiling the sides: stop periodically and check the silhouette to avoid losing the intended shape.
- Uneven length: measure from the center of the cuticle to the tip frequently while filing.
- Weak point: ensure there’s an apex (a slight curve) just before the tip to add strength—this is critical for durable stiletto nail ideas.
If you want step-by-step visual ideas, browse curated galleries for seasonal looks and step sequences like the 2025 nail ideas collection: https://naildesignerai.com/blog/2025-nail-ideas.
Practice drill:
- On a tip or form, draw the centerline with a fine marker. File to the line and then check the sides. This visual guide accelerates mastery of consistent stiletto nail ideas.
Application & Curing
The choice of product—acrylic, hard gel, or builder gel—affects how you approach these stiletto nail ideas. For beginners, builder gel over tips is forgiving and easier to shape than acrylic, but each system has pros and cons.
Acrylic workflow (bullet points):
- Mix monomer and powder to a medium bead consistency.
- Place bead at the apex and sculpt toward the tip to create strength.
- Maintain even bead placement; thin beads near the cuticle reduce lifting.
- Finish by filing and buffing once fully cured/dried.
Builder gel workflow:
- Apply thin base and cure briefly to tack.
- Add a medium-viscosity builder gel to form structure; cure in layers to avoid overheating.
- Model the apex slightly behind the tip and cure fully before refining.
Dip powder workflow (summary):
- Prime the nail and apply base, then dip into powder, repeat layers and seal with activator.
- Use thin layers to control bulk and add strength gradually.
Curing tips for reliable outcomes:
- Follow manufacturer times; over-curing wastes product and under-curing weakens structure.
- For heat spikes on long stiletto nail ideas, cure in shorter bursts and let the nail rest between cures.
After curing, always refine the shape with a fine file and buff. Seal with a high-quality top coat for shine and protection. Maintaining proper curing times and thin layers is essential to avoid heat spikes or uneven curing—key practical points for reliable stiletto nail ideas.
Design Techniques for stiletto nail ideas
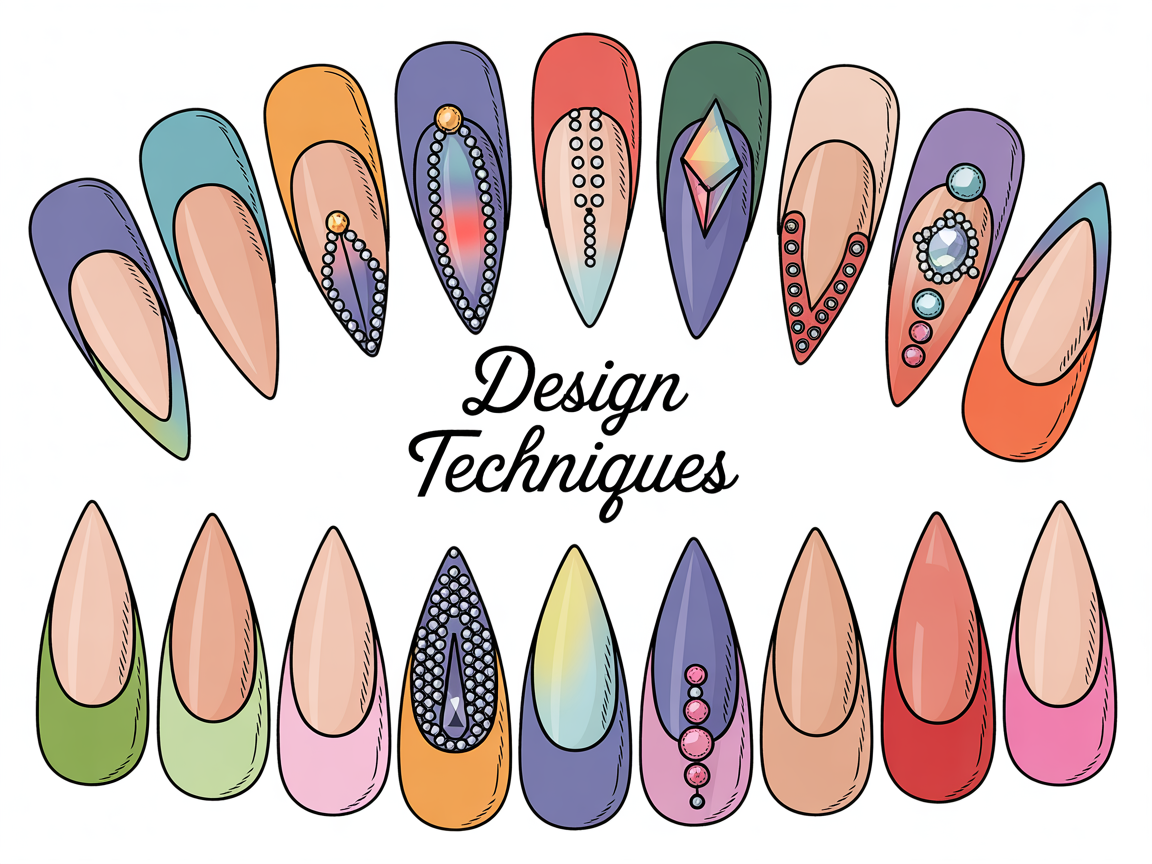
Design brings personality to stiletto nail ideas. The narrow, pointed canvas makes every mark more visible, so refine techniques that translate well at the tip.
Gradient / Ombré technique:
- Use two or three complementary shades.
- Apply the base color, then use a micro sponge to dab the gradient from cuticle toward tip.
- Blend with a clean brush dipped in acetone for softer transitions; seal with top coat.
Negative space and geometric lines:
- Tape off areas to create crisp negative space shapes.
- Thin brushes and contrasting colors yield modern minimalist stiletto nail ideas.
Rhinestone and jewel placement:
- Use a small dot of builder gel or resin, place the stone, and cure. Finish with a ring of top coat to protect edges.
- Keep heavy embellishments lower on the nail to avoid tip stress.
Hand-painted details:
- Thin your polish or acrylic paint for finer strokes.
- Practice motifs on a nail wheel—florals, stripes, or abstract swirls translate beautifully into stiletto nail ideas.
Finishing textures:
- Matte top coats can turn glossy designs into muted elegance.
- Chrome powders require a smooth base and careful buffing for reflective finishes.
Practical gallery references and seasonal motifs can spark new designs—see Valentine’s Day looks adapted for stiletto nails: https://naildesignerai.com/blog/valentines-day-nails. The explore gallery is also excellent for visual inspiration: https://naildesignerai.com/explore/cm5i05ut901c6pb1e2gss81cf.
Troubleshooting & Maintenance
Even experienced nail artists encounter issues. Troubleshoot common problems in stiletto nail ideas with these quick fixes and preventative strategies.
Lifting:
- Cause: moisture, insufficient prep, or product mismatch.
- Fix: remove product, re-prep the natural nail, and rebuild with correct bonding steps.
Breakage and stress cracks:
- Cause: weak apex, long unsupported length, or heavy impact.
- Fix: shorten to a safer length, add reinforcement with a silk or fiberglass wrap if needed, and rebuild the apex.
Uneven finish and bubbling:
- Cause: product contamination, trapped dust, or improper curing.
- Fix: file to smooth, clean, and reapply thin, even layers, curing between coats.
Maintenance schedule and client care:
- Recommend gentle filing and oiling to clients to extend life between fills.
- A refill every 2–3 weeks keeps stiletto nail ideas tidy and prevents stress at the cuticle.
If you want to save tutorials or access member-only features, the site account area is located at /auth/register for registration and profile options.
Conclusion
These stiletto nail ideas give you a practical roadmap: gather proper tools, master shaping and application, and layer in design techniques that suit your style. Practice the shaping drills, experiment with builder gel or acrylic workflows, and use visual galleries to keep your ideas fresh. With consistent practice and attention to prep and structure, the skills in this hands-on tutorial will help you deliver strong, beautiful stiletto nails every time. Keep refining one technique at a time and refer back to visual references and seasonal collections to evolve your stiletto nail ideas.