
Learn Neon Nail Ideas: A Hands-On Tutorial
Learn neon nail ideas by practicing hands-on techniques in this step-by-step tutorial. Whether you’re a beginner or refining salon skills, this guide walks you through supplies, basic techniques, three full designs, finishing tips, maintenance, client considerations, and troubleshooting so you can build real skills and creative confidence.
Supplies and Prep
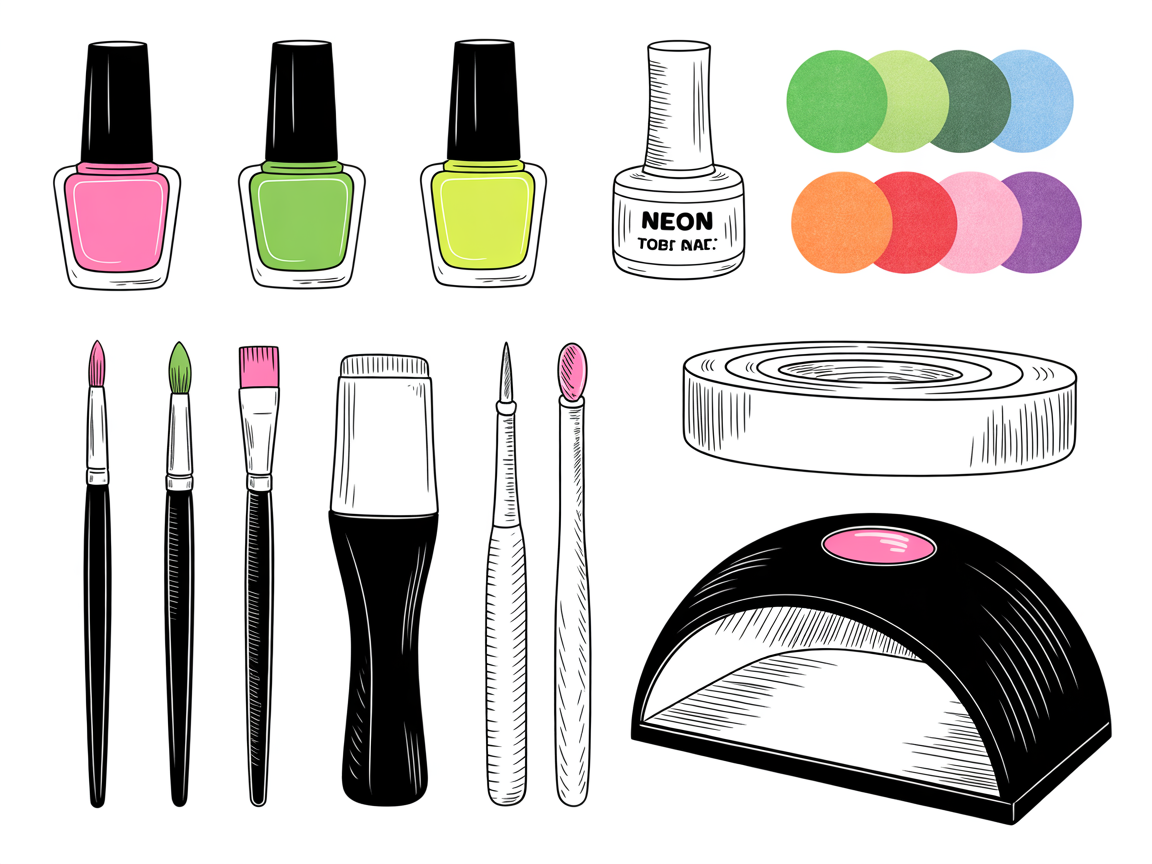
Gather the right tools and materials before you begin. Good supplies make neon nail ideas easier and more reliable. Consider these product recommendations:
- Base coat: a ridge-filling base like a protein-enriched or strengthening base coat.
- White polish: choose a high-opacity white to ensure neon vibrancy.
- Neon polishes: pick high-pigment brands known for opacity; include at least four bright shades.
- Gel alternatives: choose a LED-curable builder gel or neon gel polish for longer wear.
- Brushes and dotting tools: synthetic brushes hold neon polish well and resist fraying.
- Top coat: a quick-dry glossy top coat or a durable gel top coat for salons.
- Prep tools: an emery board, 180/240 buffer, cuticle pusher, and cleanser.
Set up your workspace with a manicure lamp, lint-free wipes, and a dedicated tray for brushes and polishes. Label your neon bottles if you mix or thin them, and keep a small dropper for mixing small batches.
Prep steps:
- Sanitize and remove all oils from the nail plate with cleanser.
- Gently buff and reshape nails to the desired form.
- Apply a thin base coat and cure if using gel systems.
- Paint a white base if using sheer neon polishes; allow full drying or cure.
Prep and organization reduce errors and speed up your workflow. If working on clients, consult about nail length and color intensity preferences.
Step-by-Step Neon Nail Ideas
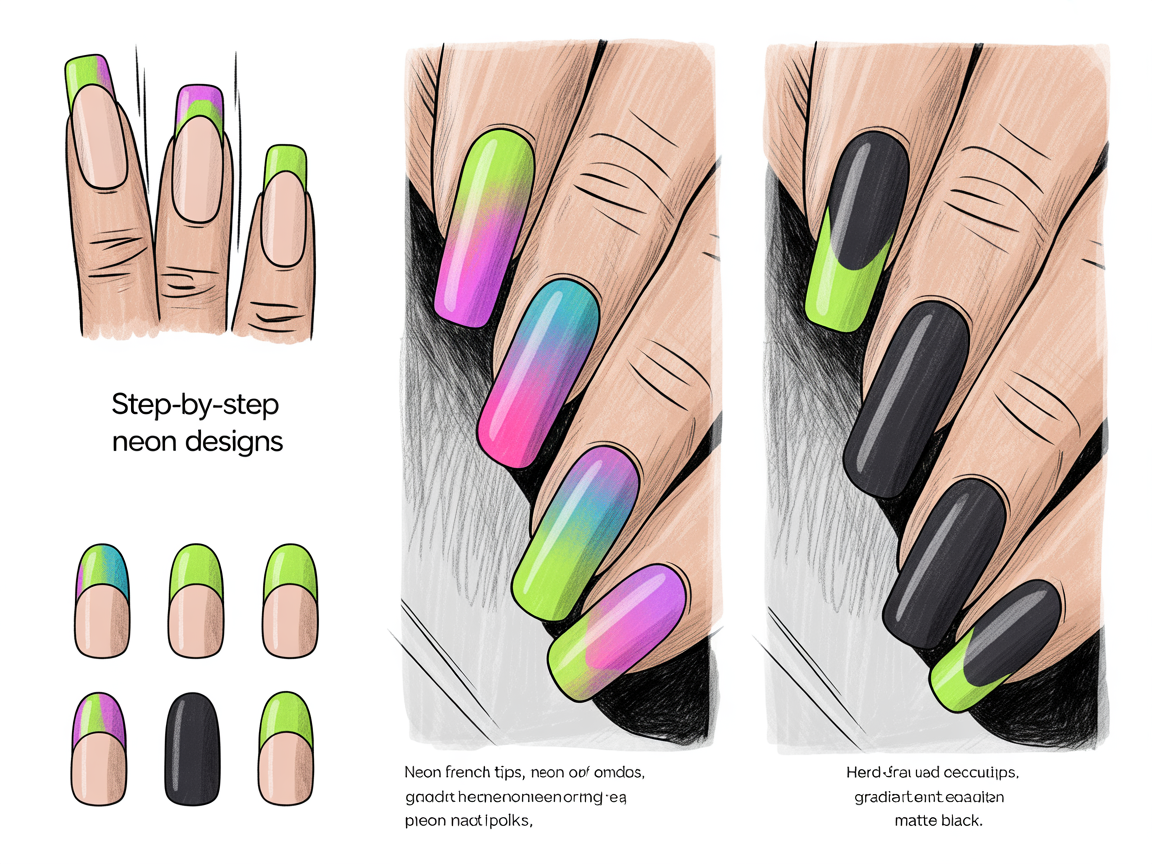
This section provides in-depth steps, timing, and variations for three neon designs: French tips, gradients, and neon accents.
Neon French Tips (Beginner to Intermediate)
- Timing: allow 60–90 seconds drying between thin coats; two coats of neon tip usually suffice.
- Method: use a thin striping brush to freehand a curved smile line or use guide stickers for consistency.
- Layering: apply a thin neon layer, wait until it's tacky, and then add a second coat for opacity.
- Clean-up: dip a fine brush in acetone to sharpen the smile line if needed.
Design tweaks:
- Double-line French: add a parallel thin neon stripe above the tip for a modern twist.
- Color swap: alternate neon colors across fingers for variety.
Neon Ombre Gradient (Intermediate)
- Setup: use a fresh makeup sponge and dab excess on a paper towel before applying to nails.
- Blend control: apply neon colors in overlapping stripes on the sponge and press lightly on the nail, repeating until even.
- Sealing: a thin glossy top coat helps blend the sponge texture into a smooth finish.
Advanced gradient tips:
- Use a small amount of white polish on the sponge to mute transitions for a pastel glow.
- For longer nails, span three colors to create a striking vertical blend.
Neon Accents and Micro Art (Intermediate to Advanced)
- Precision: use a 000-size brush for tiny florals or detailed geometric shapes.
- Contrast: paint a base with matte or glossy neutral tones and apply neon accents for immediate impact.
- Layering: allow accents to cure or dry fully before adding lines or highlights.
Practice tasks for precision:
- Draw five identical dots using only wrist movement to improve steadiness.
- Paint a small neon heart on each nail in under one minute to increase speed.
Finishing, Sealing, and Maintenance
Proper finishing protects neon colors and preserves shine. Small steps in sealing and maintenance extend wear and vibrancy.
Sealing techniques:
- Apply a flood coat: one thin coat applied evenly and sealed at the edge reduces snags.
- Spot glossing: for matte neon designs, add small gloss accents to highlight shapes.
- Gel systems: ensure no product touches the skin and cure each layer to avoid lifting.
Maintenance routine:
- Recommend light-handed chores and gloves for clients with neon manicures.
- Offer a maintenance polish top-up after a week for professional sets.
Removal and repair:
- For polish: use acetone-soaked cotton and foil for targeted removal of stubborn neon polish.
- For gels: follow manufacturer soak-off directions and avoid peeling to protect the nail plate.
Additional finishing details:
- For a high-gloss mirror effect, apply two thin top coats and cure each layer if using gel.
- Layer a thin top coat, let it flash cure briefly, and then finish with a full cure to reduce surface imperfections.
Advanced Tips and Troubleshooting
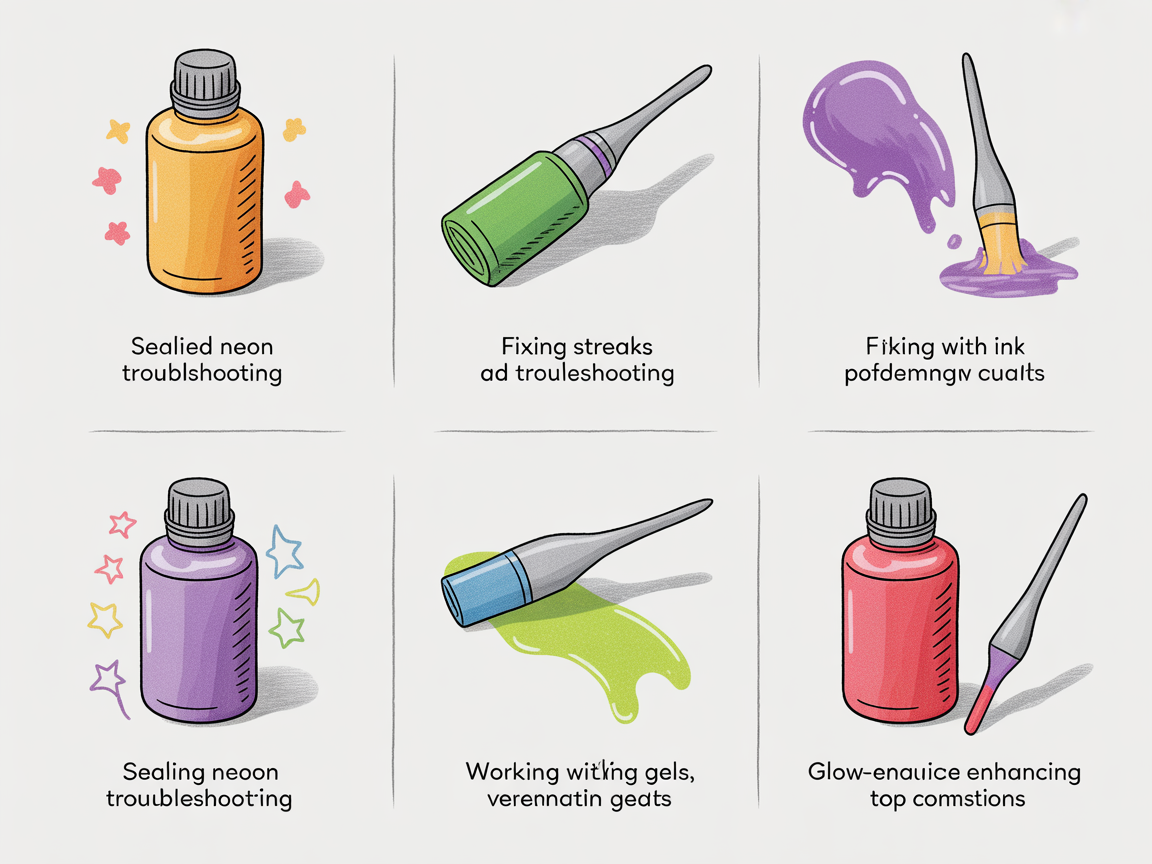
Neon pigments require special handling. This section helps you diagnose issues and refine advanced techniques.
Color consistency and mixing:
- Replicate a look by mixing small batches with a glass mixing palette; record ratios to reproduce the color.
- Add a touch of white to neon to create wearable pastel neon variations for clients who prefer subtler tones.
Fixes for common problems:
- Peeling: ensure nails are fully dehydrated and use a strong adhesive base coat.
- Tiny bubbles: avoid shaking polish; roll bottles between palms to mix pigments.
- Uneven gloss: apply a second thin top coat and buff lightly if required (only on hard polish surfaces).
Salon speed hacks:
- Batch similar steps: apply base coats across all nails before moving to color application.
- Use a fast-curing LED lamp to reduce client wait time when working with gels.
Safety and client comfort:
- Avoid direct skin contact with gels and use barrier creams when applying near cuticles.
- Ventilate the workspace and use low-odor removers to keep the environment comfortable.
Practice, Variations, Client Advice, and Resources
Practicing neon nail ideas helps you adapt designs to different nail lengths and client preferences. Consider these adaptation notes:
- Short nails: scale down intricate patterns and emphasize accent fingers.
- Long nails: use larger color spans and multiple gradients per nail.
- Nail shapes: convert designs to almond, square, or coffin shapes by altering the placement of neon accents.
Client consultations:
- Ask about lifestyle and maintenance commitment to choose between polish and gel options.
- Suggest intensity options by layering; record client preferences for consistent results on return visits.
Practice schedule (detailed):
- Week 1: 10 practice sets of neon French tips and edge sealing.
- Week 2: 15 gradient blends on nail wheels and sponges.
- Week 3: 20 neon micro art accents focusing on speed and precision.
- Week 4: Combine all techniques into full sets and time yourself for efficiency.
Inspiration and galleries:
- long nail ideas: https://naildesignerai.com/nail-ideas/long-nail-ideas
- short nail designs: https://naildesignerai.com/blog/short-nail-designs
- neon gradient gallery: https://naildesignerai.com/explore/cm5i00r0100frpb1eqg443e3j
- neon accents gallery: https://naildesignerai.com/explore/cm5i00ohx00dipb1ebe75h1jl
For account tools and downloadable templates, see /auth/register.
Conclusion
Learning neon nail ideas takes focused practice, the right supplies, and careful finishing steps. This hands-on tutorial explored detailed prep, three working designs, finishing, maintenance, advanced fixes, and client-focused variations so you can build both speed and precision. Revisit the drills, experiment with color mixes, and adapt techniques to each nail length to make neon a reliable part of your creative toolkit.