
Black and White Nail Ideas: From Beginner to Pro
Black and White Nail Ideas: From Beginner to Pro
Black and white nail ideas are timeless, versatile, and surprisingly approachable for every skill level. This guide takes you from simple starting steps to advanced techniques, covering tools, common pitfalls, and practical tips to level up your monochrome manicure game. You’ll find methodical practice drills, finishing secrets, and ways to adapt looks for any season or occasion.
Why choose black and white nail ideas?
Black and white nails make a bold statement while remaining elegant and easy to adapt. They work on any nail length and shape, and they pair well with texture, gloss, and metallic accents. Whether you prefer minimalist dots or intricate line work, black and white nail ideas create high-contrast looks that photograph beautifully.
These classic colors are also forgiving for experimentation. Black and white contrast helps tiny details read clearly, and negative space techniques look deliberate rather than messy when done in monochrome. Photographers and social media creators favor black and white designs for their clarity and visual impact.
Top black and white nail ideas for all skill levels
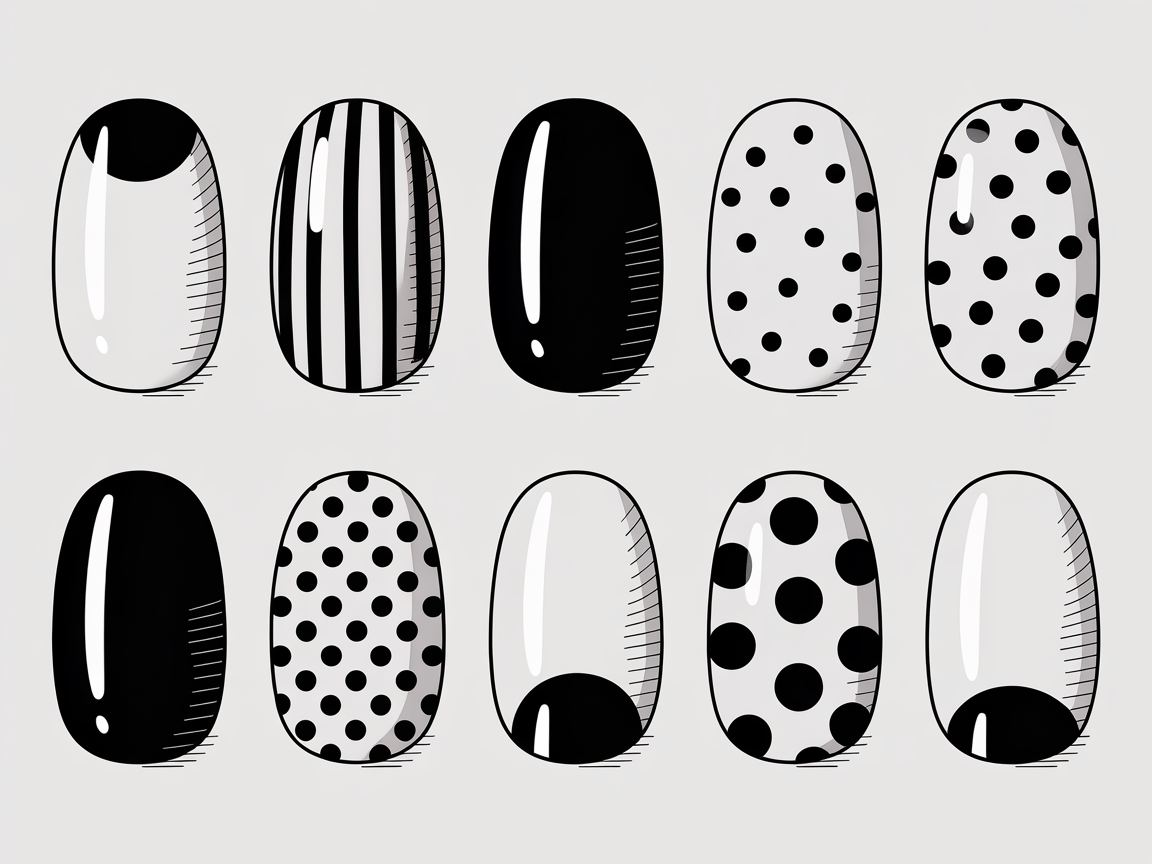
Start with these approachable designs and build confidence:
- Classic French twist: swap the white tip and black base or vice versa.
- Polka dot accents: use a dotting tool for even, playful spots.
- Minimal negative space: leave slivers of natural nail between bold shapes.
- Thin line art: draw one or two contrasting lines across the nail.
- Half-moons and crescent tips: paint the cuticle area a contrasting color.
Practice these basics on a nail wheel or press-ons before working on natural nails. Taking time to practice will reduce mistakes and increase speed. For example, try replicating the same polka dot pattern across five press-ons until spacing feels consistent.
Visit this medium nail ideas page to match designs to specific lengths and shapes recommended for different looks.
Beginner-friendly black and white nail designs
Tools to have on hand:
- Two high-quality polishes: opaque black and crisp white.
- Base coat and top coat.
- Dotting tool or toothpick.
- Striping brush or thin liner brush.
- Nail file, buffer, and cuticle pusher.
Step-by-step: Simple polka dot manicure
- Prep nails: shape, buff lightly, and push cuticles.
- Apply base coat and let dry.
- Paint two thin coats of white and allow full drying time.
- Dip a dotting tool into black polish and place dots in a pattern.
- Seal with a fast-dry top coat.
Practice tip: Keep a paper towel and acetone brush handy to clean small mistakes. Wiping tools clean between uses prevents excess polish buildup which can ruin patterns.
Common beginner pitfalls
- Working on nails that are not fully dry leads to smudges. Use a fan or quick-dry drops after each layer.
- Using too much polish on tools makes blobs rather than clean dots.
- Skipping a base coat can cause staining and shorten wear time.
If you like seasonal cues or trend-specific looks, see our January nail ideas to find winter-ready motifs and color accents you can adapt to black and white.
Tools and techniques for progressing
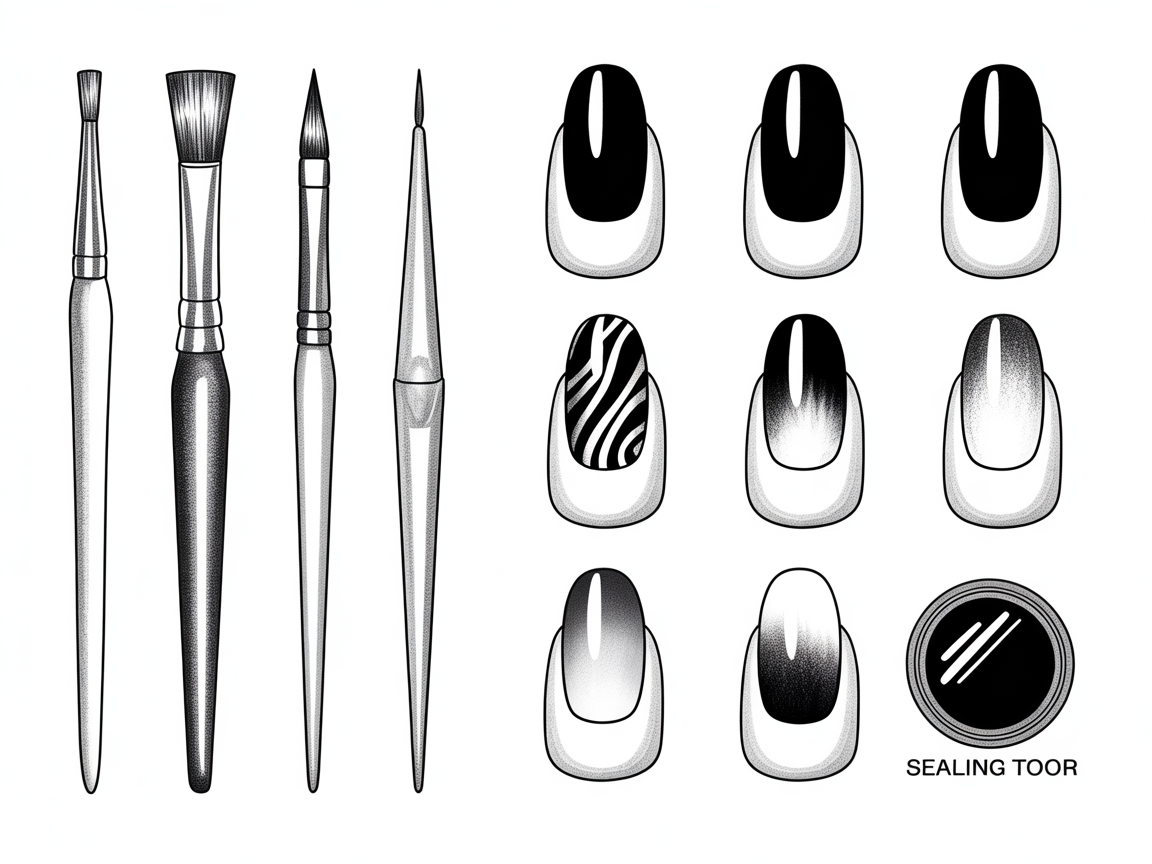
As you progress, invest in a few tools that expand what you can create:
- Detail brushes: fine liners and ultra-thin brushes for crisp strokes.
- Stamping plates and stamper: reproduce complex patterns quickly.
- Nail tape: for sharp geometric shapes and negative-space designs.
- Gel polish kit: for extended wear and built-up textures.
Technique tips:
- Control your breathing and wrist stability when painting thin lines; lean your forearm on a table and move the brush, not your fingers.
- Use quick-dry drops or a fast top coat when layering high-contrast colors.
- For marbling, drop black and white polish into a cup of room-temperature water and drag a toothpick for pattern.
Stamping and decals
Stamping allows complex motifs like florals or geometric grids to appear crisp in black and white. Practice alignment on a single nail before doing full sets. Use dedicated stamping polish for better opacity.
Gel-specific tips
When working with gel polish, cure thin layers fully. Thick, under-cured layers lead to lifting. For layered art, cure each stage separately and finish with a no-wipe top coat for a sealed, high-contrast finish.
Micro-practice drills
- Draw 10 straight lines on a practice wheel with a striping brush.
- Create a grid of dots with a dotting tool to improve spacing.
- Time yourself doing a single-line French tip; speed improves with repetition.
If you need fresh inspiration from community designs, browse explore pages for user-generated patterns and variations at https://naildesignerai.com/explore/cm5i00gxk006upb1er9v0ntr6.
Design ideas by nail shape and length
Short nails: go bold with high-contrast single shapes. Try a single black diagonal stripe on white background or alternating black and white nails.
Medium nails: experiment with half-moons and inverted French tips. For medium lengths, you can include small negative-space hearts or linear chains.
Long nails: add complex line art, ombre effects with black-to-white gradients, and tiny stamped motifs across nails. Longer canvases also allow for mixed finishes like matte panels and glossy accents.
Choosing the right scale
Pattern scale matters: big checkers on short nails can look crowded, while micro-dots on long nails may lose impact. Adjust motif size to the nail’s visible surface.
Salon finishes and texture tricks
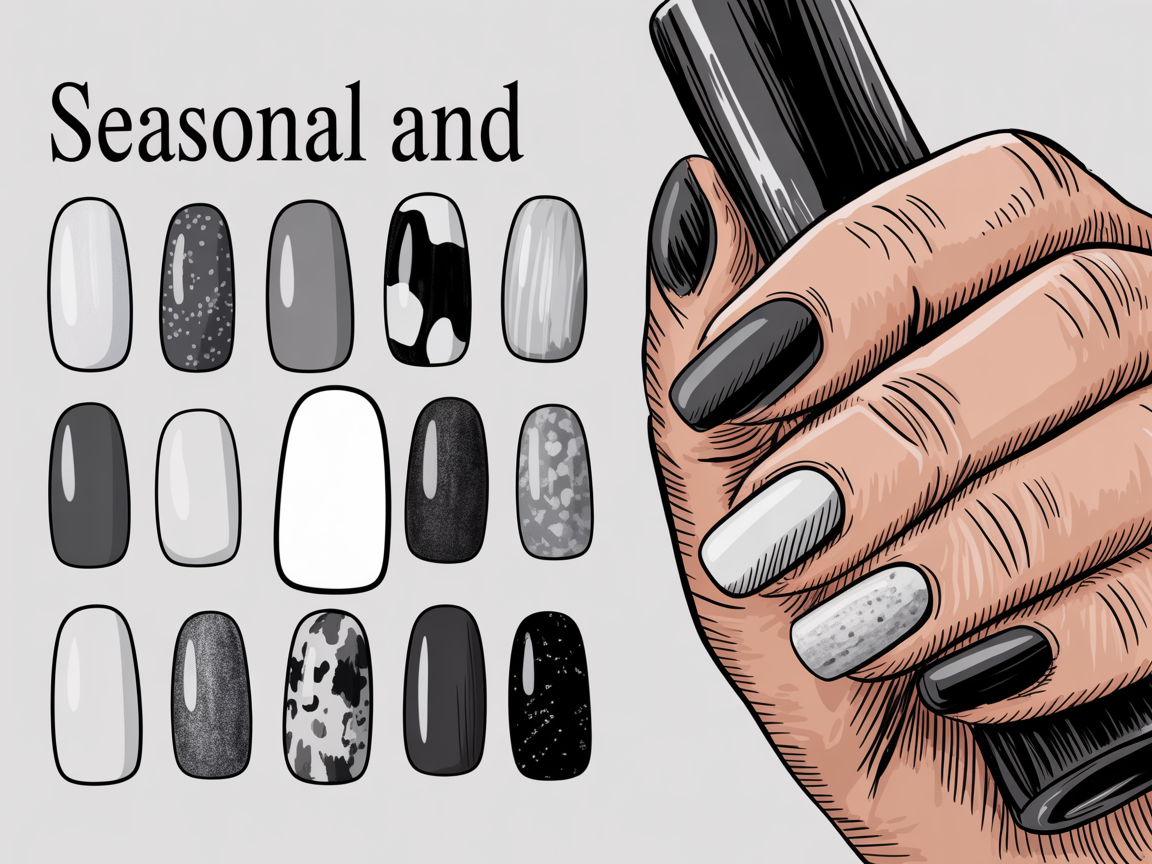
Gloss vs. matte: Choose a gloss top coat to make black pop, or a matte finish to soften the contrast. Mixing finishes is a modern tactic — glossy accents on matte bases read as intentional and refined.
Accent materials:
- Silver foil or thin chrome strips for a luxe touch.
- Micro-beads or studs for three-dimensional accents.
- Fine glitter or shimmer for subtle highlights on white areas.
Application tips for texture
- Apply adhesives sparingly for studs; too much glue creates bumps under top coat.
- Seal foil edges with a thin layer of top coat to prevent lifting.
Sealing for longevity
- For regular polish: two thin coats of top coat every few days maintain shine.
- For gel: ensure curing times match the manufacturer's guidance and finish with an appropriate gel top coat.
Troubleshooting and common mistakes
- Yellowing or staining: always use a base coat under dark colors and opt for a barrier base if staining persists.
- Uneven coverage: apply thin, even layers and allow full drying between coats. If streaking appears, try a sheer base color or add a third thin coat.
- Chipping: avoid thick edges and cap the free edge with top coat. Maintain nails by filing gently between salons.
Emergency fixes
- Quick repair: dab small chips with matching polish and seal with top coat.
- Smudge rescue: if you smudge a freshly painted nail, wait until tacky and drag a clean brush dipped in polish remover around the smudge to reshape, then reapply polish.
Mixing patterns: balance and negative space
Black and white allow strong graphic statements. Balance is key: too many patterns can read busy, so leave negative space or single accent nails.
Pattern pairing ideas:
- Stripes + dot accent: combine a striped thumb with a dotted ring finger.
- Checkerboard + solid: pair a checkerboard accent nail with three solid colors.
- Minimal line art + glossy accent: fine black line art on a white base with one glossy black nail.
Photography and presentation
Good lighting shows contrast: shoot near a window with diffused light. Use a neutral background to let black and white nail ideas stand out. A close-up with the hand slightly curved shows the nail surface and texture clearly.
Care and maintenance for long-lasting wear
- Hydrate cuticles daily with oil and avoid harsh acetone-based removers frequently.
- Wear gloves for cleaning to reduce polish wear and prevent chips.
- Schedule touch-ups and top coat refreshes every 7-10 days for painted polish.
Removing gel and heavy art
- Soak-off gel requires careful filing and acetone wrapping. Do not peel gels off — this damages the nail plate.
- For heavy embellishments, remove adhesives gently and buff residual glue before applying fresh polish.
Saved designs are accessible at https://naildesignerai.com/auth/register for those who use the site’s generation and saving tools.
Conclusion
Black and white nail ideas remain a top choice because they are flexible, striking, and scalable from beginner drills to pro-level art. With basic tools, steady practice, and a few advanced techniques, you can create durable and photo-ready monochrome manicures. Start with simple dots or stripes, practice thin-line control, and experiment with finishes and texture to refine your signature black and white look.